

Support our independent tech coverage. Chrome Unboxed is written by real people, for real people—not search algorithms. Join Chrome Unboxed Plus for just $2 a month to get an ad-free experience, access to our private Discord, and more. Learn more about membership here.
START FREE TRIAL (MONTHLY)START FREE TRIAL (ANNUAL)
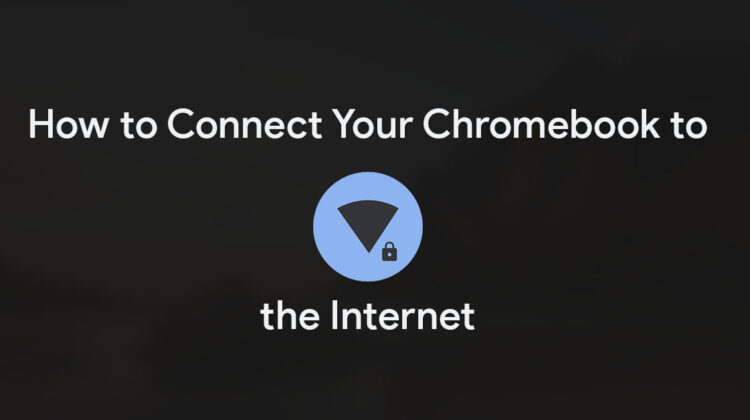
With so many people picking up new Chromebooks for the holidays, we thought it would be good to go back to basics and put out a bit of content to help those unfamiliar with them to get up and running. We’re all in this together, so today, we’re going to be showing you exactly how to connect your Chromebook to your home or public Wi-Fi network so that you can start browsing the internet!
Before we get started
If you’re unsure of whether or not you have wireless internet compared to a standard, wired connection or just don’t know your Wi-Fi password, then you should contact your internet service provider, or ISP, before we continue. In order to connect your new Chromebook to your home network, you’ll need what’s called the SSID or network name and its password.
Generally, you receive both of these on the yellow carbon copy that your ISP installation technician gives you after setting everything up and you sign off on it. I’ve seen some people place this on their fridge, but it could also be in your junk drawer or document storage somewhere – especially if it’s been years since you’ve needed to reference it. If you just set up your old computer and or your phone and haven’t switched devices in a long time, it’s easy to forget that this exists or that it’s necessary, so just call them up and ask if they can help you out. Once you acquire both, you’ll want to write them down somewhere secure so that you can use them again in the future.
Connecting out of the box
Okay, connecting your Chromebook to the Wi-Fi in your home straight out of the box is the easiest way to start surfing the net (I don’t think the cool kids call it that these days, but oh well). Actually, it’s near impossible to mess this up because you’re forced to stare at just and only that one piece of information until you handle it during the out of the box experience, or OOBE for short. Google has created this to take you step by step through the processes needed to make your Chromebook functional. You’ll first power it on, then you’ll choose the time, date, and language, sign in to your Google account using your Gmail address, and then you’ll be presented with the screen that asks you to select which wireless connection belongs to you.
Instead of giving you a bunch of screenshots that show this process, let’s make this easy – Google has created a Chromebook Simulator with Partnerdash that’s very handy in helping you visualize each step of the process one at a time. It’s rare to see resources this good, so make use of it! Just click the button below to go directly to the Connecting your Chromebook to Wi-Fi section.
Set your Chromebook up with this step-by-step guide
Connecting to a new network
That was easy! However, what happens when you want to connect to a new Wi-Fi network – let’s say at your summer home (lucky you), your workplace, a friend’s house, or even a public network like McDonald’s, Panera Bread, or Starbucks offers? In those situations, you’ll need to choose a new network from the list of available ones at the bottom right of your Chromebook’s shelf.
An easy mnemonic for remembering where your Chromebook’s Wi-Fi is located is “It’s time for pizza.” I know, I know, it’s weird, but I’ve used this countless times in the retail space as a Chromebook Expert to help people remember this, so bear with me. If you click on the time clock at the bottom right of your Chromebook and then locate what looks like a pizza slice, you’ll have found it. Like I said – “it’s time for pizza” – but let’s be honest, it’s always time for pizza.

- At the bottom right, select the time.
- Select Not Connected
.
Note: If you see your Wi-Fi network name and a signal strength, your Chromebook is already connected to Wi-Fi. - Turn on Wi-Fi.
- Your Chromebook will automatically look for available networks and show them to you in a list.
If you’re coming from a MacBook, you’re probably familiar with this next part, but Windows users may struggle a bit here. If you were to click on the Wi-Fi icon or pizza slice (whatever you’re calling it in your head now because of me), it simply toggles your wireless capability, so you may accidentally turn it off! In order to get a list of nearby networks, you’ll instead want to click on the words ‘Not connected’ or whatever the currently connected Wi-Fi network is listed as directly under the icon itself. For me, as you can see in the picture above, it’s called ‘Your Love is a Song’, but yours will be different. It doesn’t matter – just click the words and not the icon, that’s what’s important.
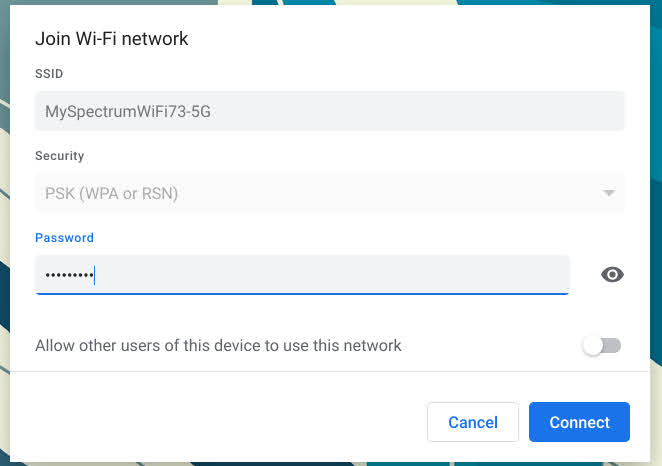
Lastly, choose a nearby network from that list. If you’re in Starbucks, it will probably be called ‘Google Starbucks’. If you’re at a friend’s house, they’ve likely named it something absurd like ‘c:/virus.exe’ or ‘Nacho Wifi’ to keep out unwanted guests, or just to be funny. Just make sure you don’t go clicking on any network name, you’ll want to use only those that are safe! Instead, ask your host which one belongs to them and retrieve the password for it. As you can see in the feature image at the top of this article, a secure network will feature a locked padlock icon next to the pizza slice.
Once you select a network name, you’ll be presented with a dialogue box in the middle of your screen. Click in the password box and type it in. Finalize your connection by pressing the blue ‘Connect’ button. Once the pizza slice in the bottom right of the screen turns a solid color instead of alternating between filled and hollow (it will be solid white if you’re in dark mode or solid black if you’re in light mode). That’s it, you’re done! Press the ‘Everything button‘ on your keyboard and start searching to your heart’s content.
If you’re out and about and are trying to connect to a public Wi-Fi, you may need to go through an additional step. After selecting that establishment’s network from the list, you’ll be presented with a notification marked with a globe icon. This is called a captive portal – click it. You’ll be redirected to a web page in the Chrome browser where you’ll need to agree to that company’s terms and conditions which just state that you won’t use their Wi-Fi for anything nefarious, illegal, or inappropriate. Once you submit that form, it’s smooth sailing surfing, so have fun!
Wrap up
If you continue to experience issues connecting your new Chromebook to your home Wi-Fi or a public network or you’d just like some additional information, you should read through Google’s support page for this topic. The Chromebook Simulator linked with the blue button above is really the best way to get started though, so be sure to click through that and get a sense for it visually. Once you’re connected, you should check out our essential video on 10 things you need to know to get started with using your new Chromebook and our Tips and Tricks for organizing your Chromebook launcher!
SUBSCRIBE TO UPSTREAM
Get Chrome Unboxed delivered straight to your inbox
Upstream is our flagship, curated newsletter with the top stories, most click-worthy deals, giveaways, and trending articles from Chrome Unboxed sent directly to your inbox a few times a week. Join 31,000+ subscribers.