


Support our independent tech coverage. Chrome Unboxed is written by real people, for real people—not search algorithms. Join Chrome Unboxed Plus for just $2 a month to get an ad-free experience, access to our private Discord, and more. Learn more about membership here.
START FREE TRIAL (MONTHLY)START FREE TRIAL (ANNUAL)
The Chromebook notification tray has recently received a huge visual refresh, and quite honestly, it looks gorgeous. I had initially predicted it with my Material You for ChromeOS mockup, and now that it’s here, it feels like just another part of the operating system. All in all, it along with the new Productivity launcher have taken Google’s laptop OS from rudimentary and passable to polished and beautiful.
That’s not to say that everything regarding the notification system is perfect, however, and if you have apps from the Google Play Store installed alongside standalone web applications, then you’ll be no stranger to the idea of receiving double notifications for YouTube, Gmail, and so on.
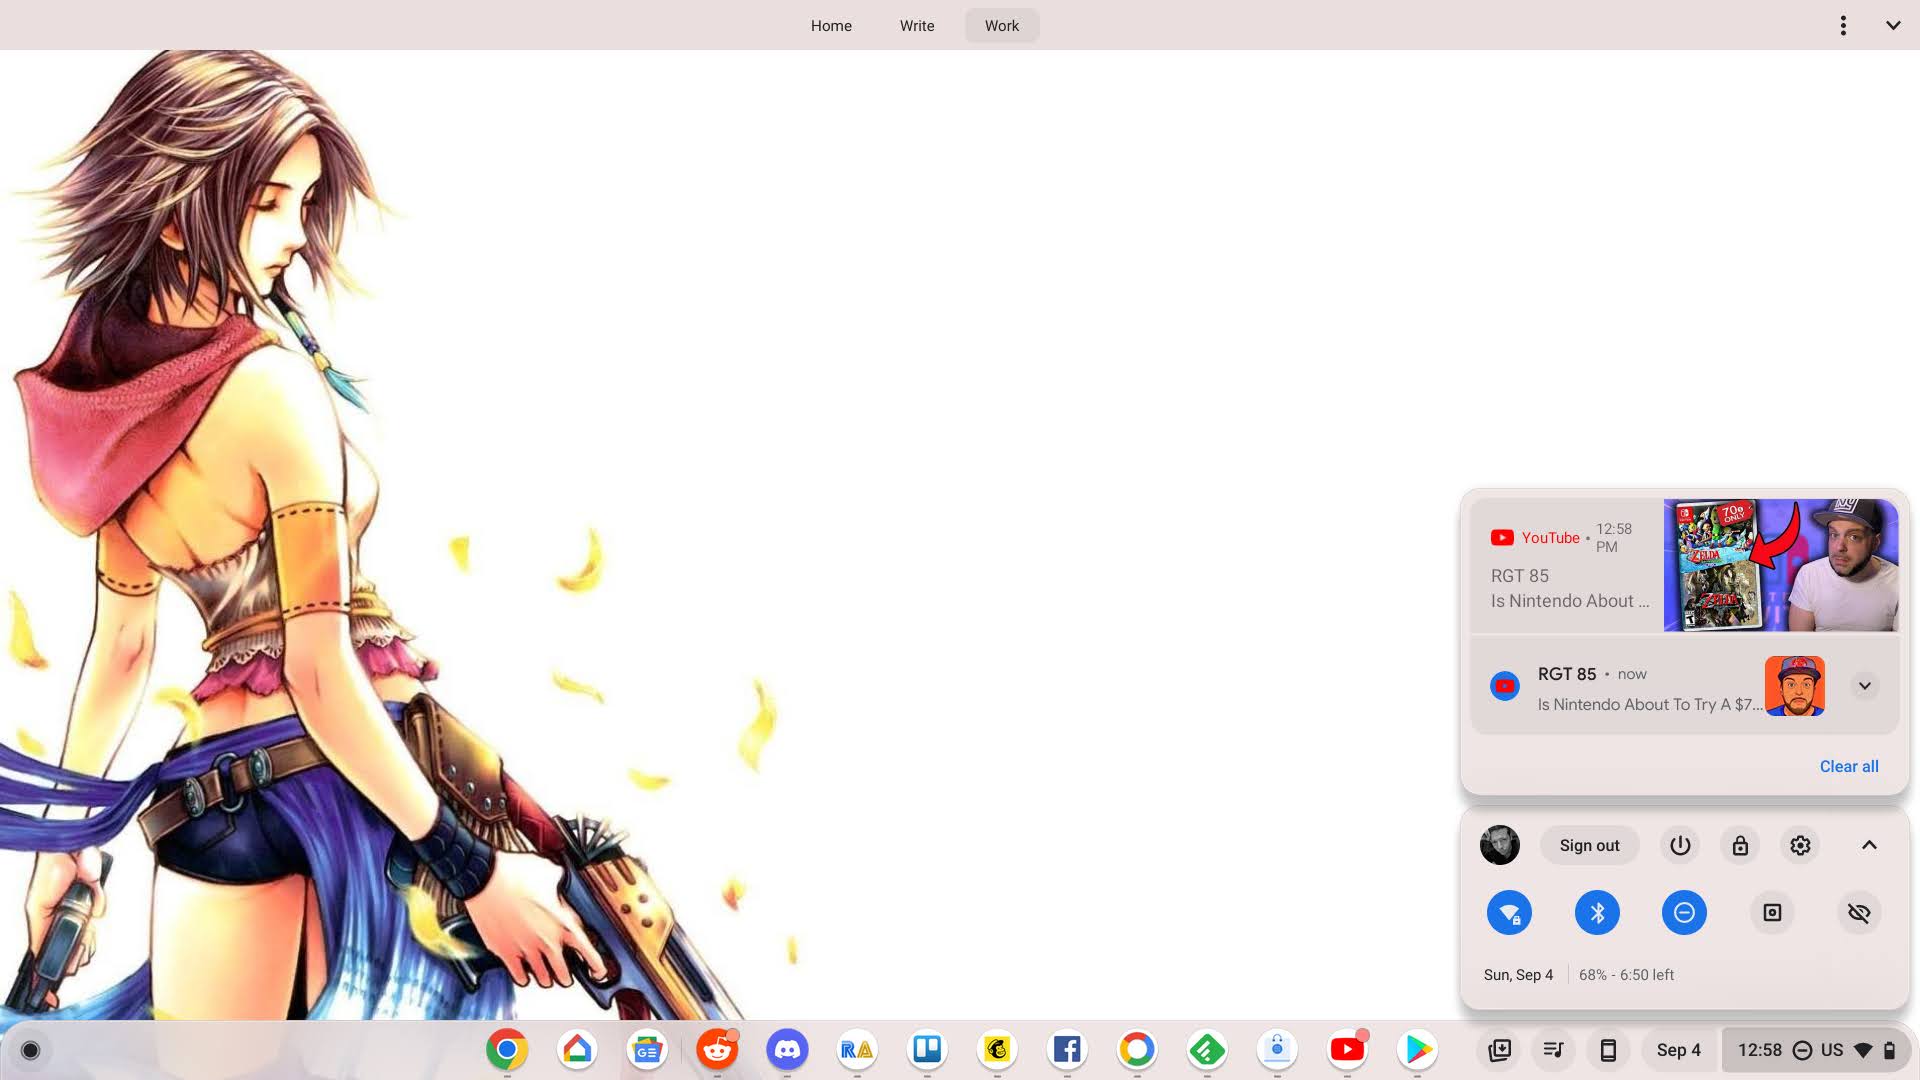
Today, I’m going to show you how to manage this, and ultimately, how to turn off one set of pings so that your tray doesn’t look absolutely and unnecessarily cluttered throughout the day! As you can see below, I have a YouTube notification from one of my favorite Nintendo content creators – RGT 85 – via the YouTube Android app. Just below that, I have the same exact notification, only it’s from the Chrome browser. This happens all the time, but there’s an easy way to prevent it from occurring.
Most people who have an app installed will no longer wish to be notified via the browser itself about updates from websites they use, so toggling Chrome would be ideal in this case. Last year, Google made it to where you no longer have to enter the browser to manage website notifications (though you still can), and instead began housing them in the ChromeOS settings via the shelf.
Did you know: If you want to keep website notifications turned on and disable notifications from apps instead, you can simply manage these individually through each app!
You can actually see these by opening the quick settings panel at the bottom right of your display (click the clock!) and clicking the arrow just to the right of the settings cog to expand it fully. Then, you should see a ‘Notifications’ section. If you click the arrow just under that to see that section’s details, you will encounter a full list of all of the apps and web apps installed on your Chromebook.
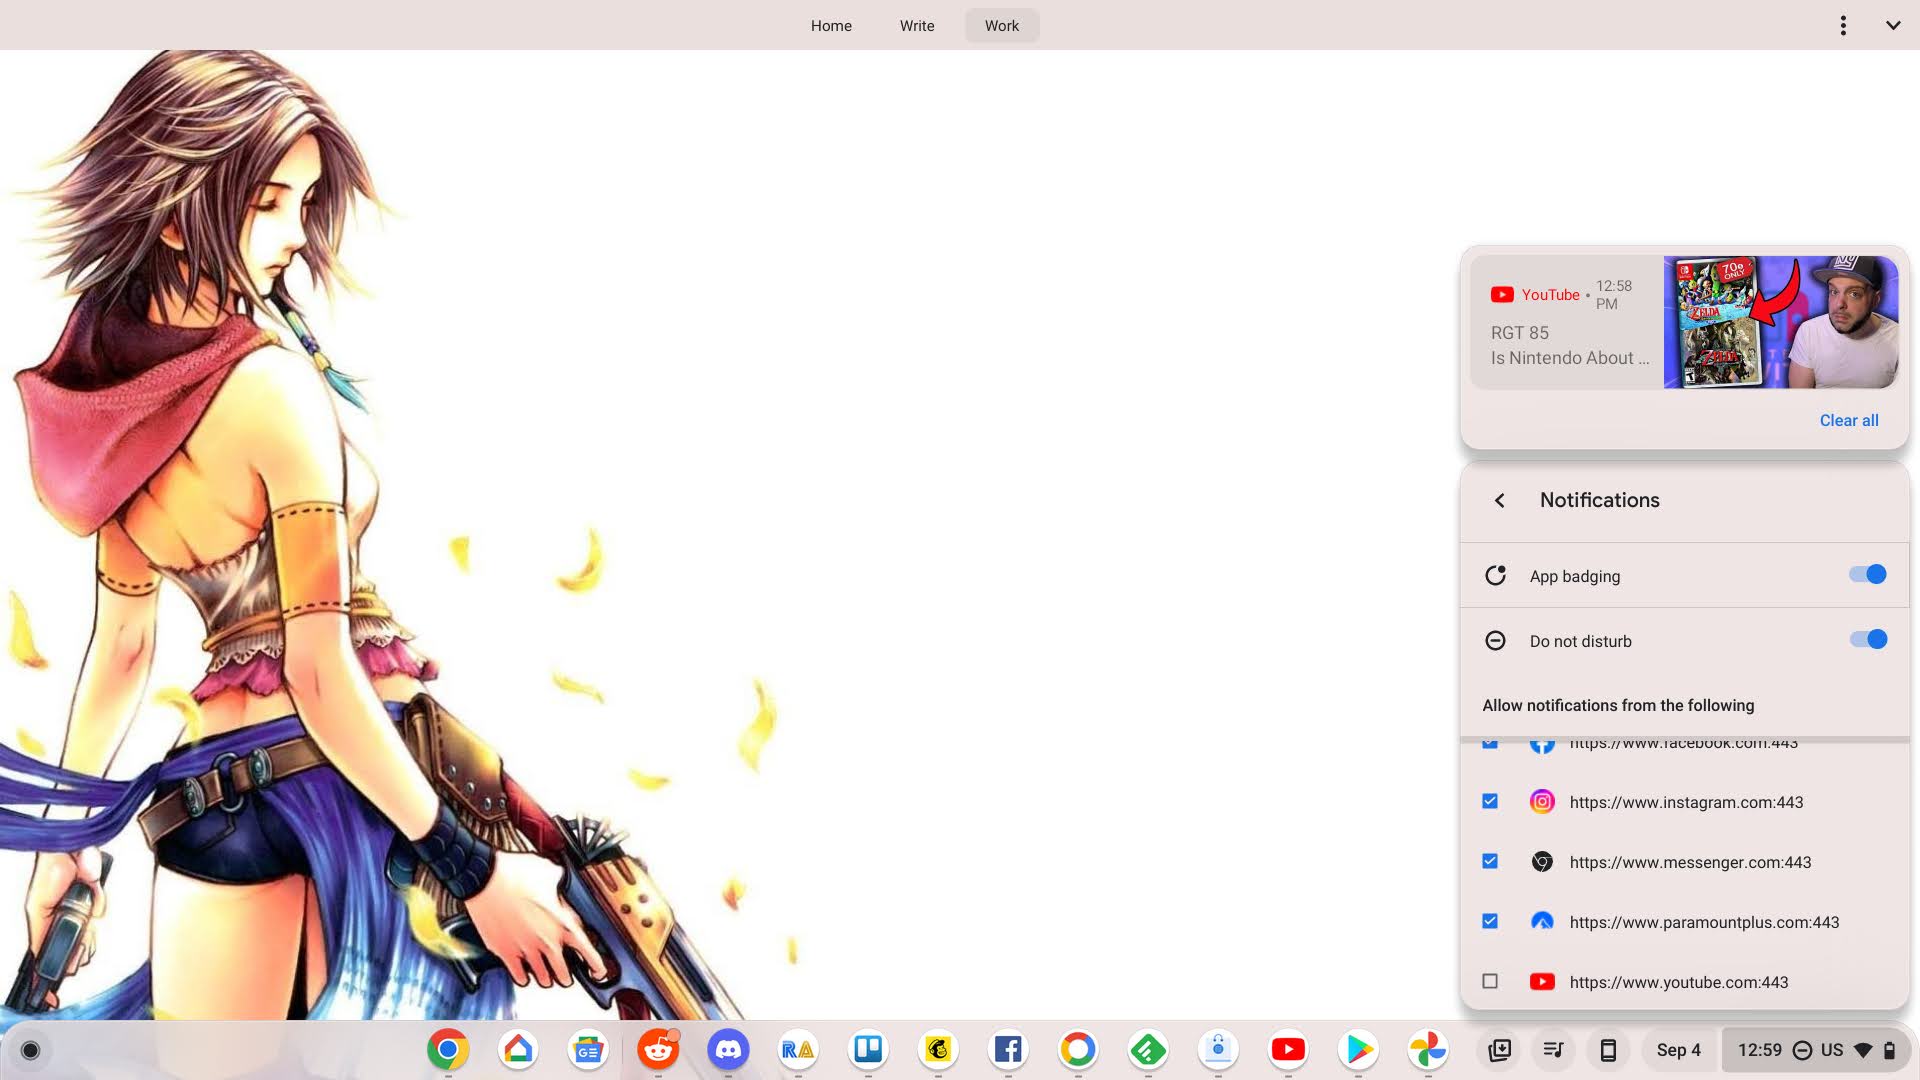
As you can see in the image above, you can toggle app badging here (the notification dot that appears at the top of an app icon when you have new information to view), as well as the do not disturb option. In the list, there are checkboxes to the left of each item, and toggling these will allow or prevent that specific app or PWA from showing notifications in your tray.
In the case of YouTube, you wouldn’t want to disable the Android version (labeled ‘YouTube’), but rather the web app labeled by its website URL. Here, it’s listed as “https://www.youtube.com:443”. If you compare the first and second image, you’ll notice that the web-based notifications have now disappeared from my shelf for YouTube.
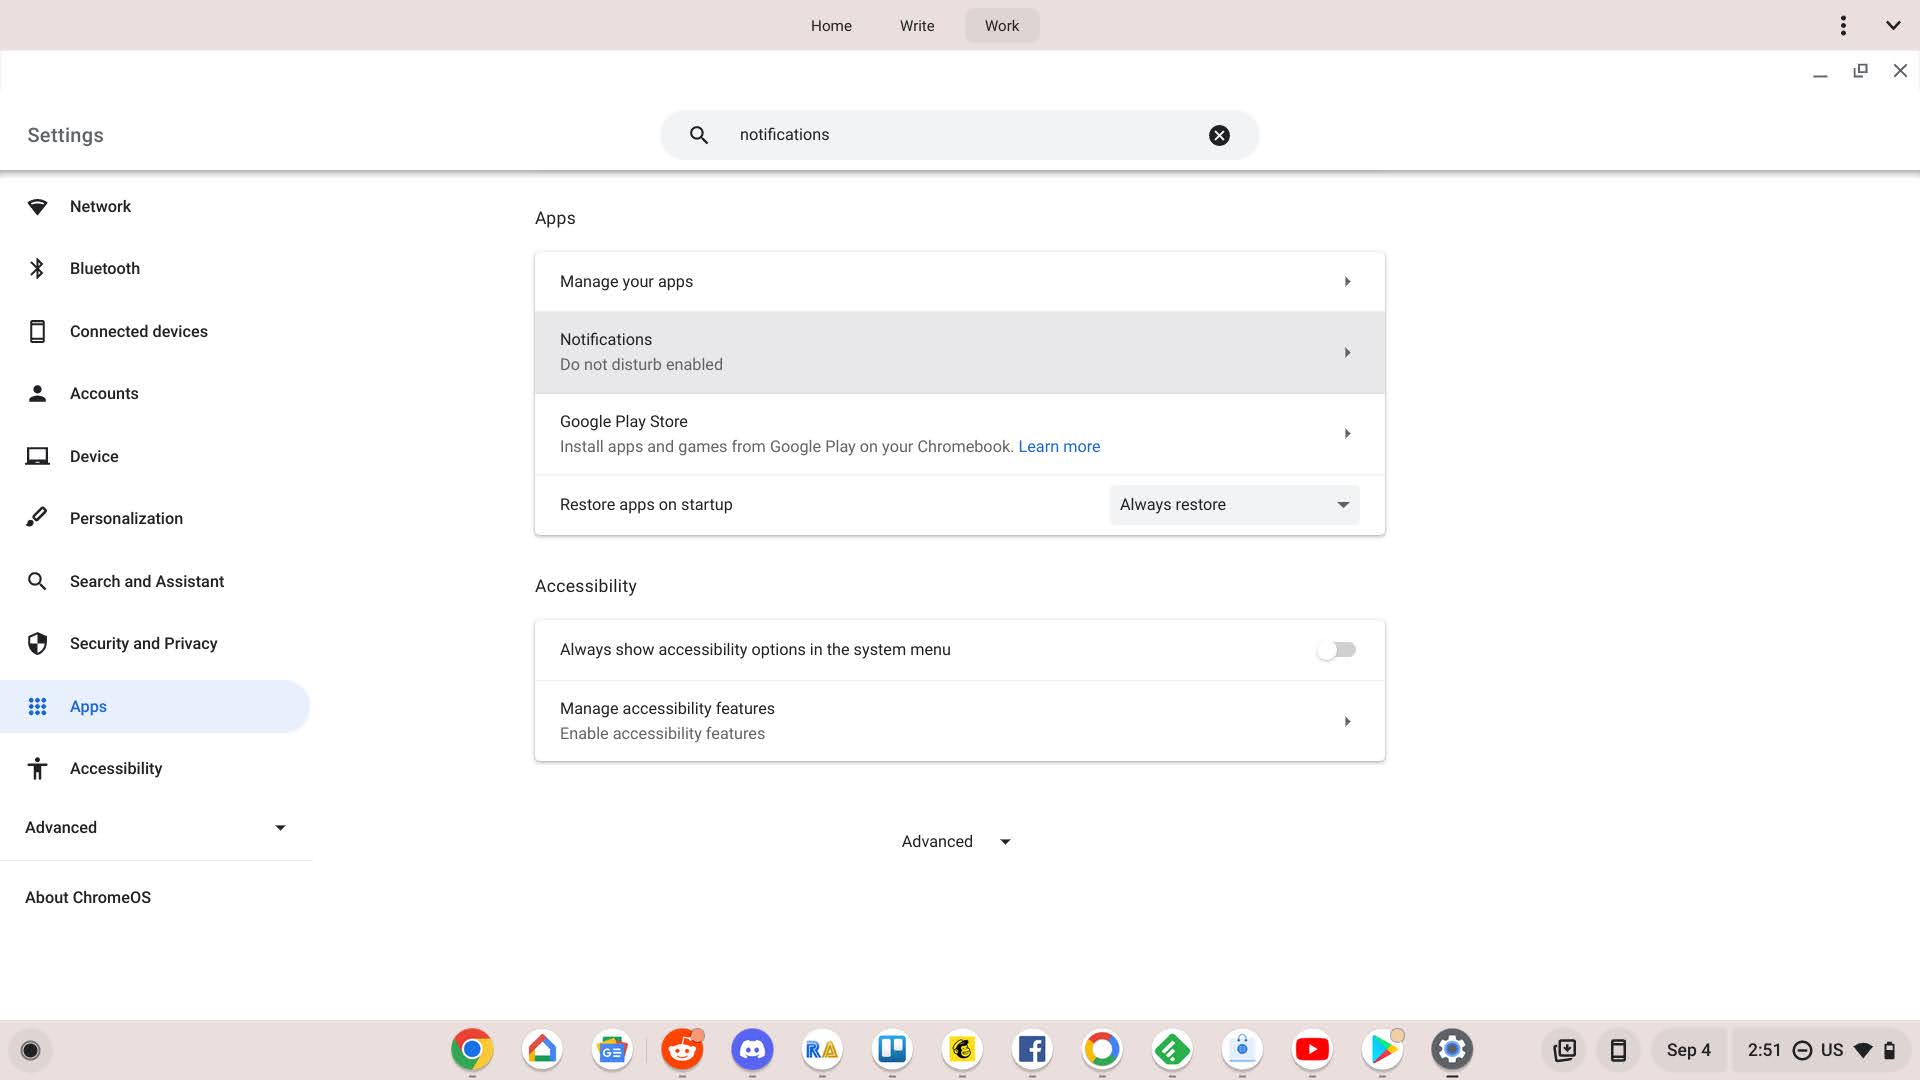
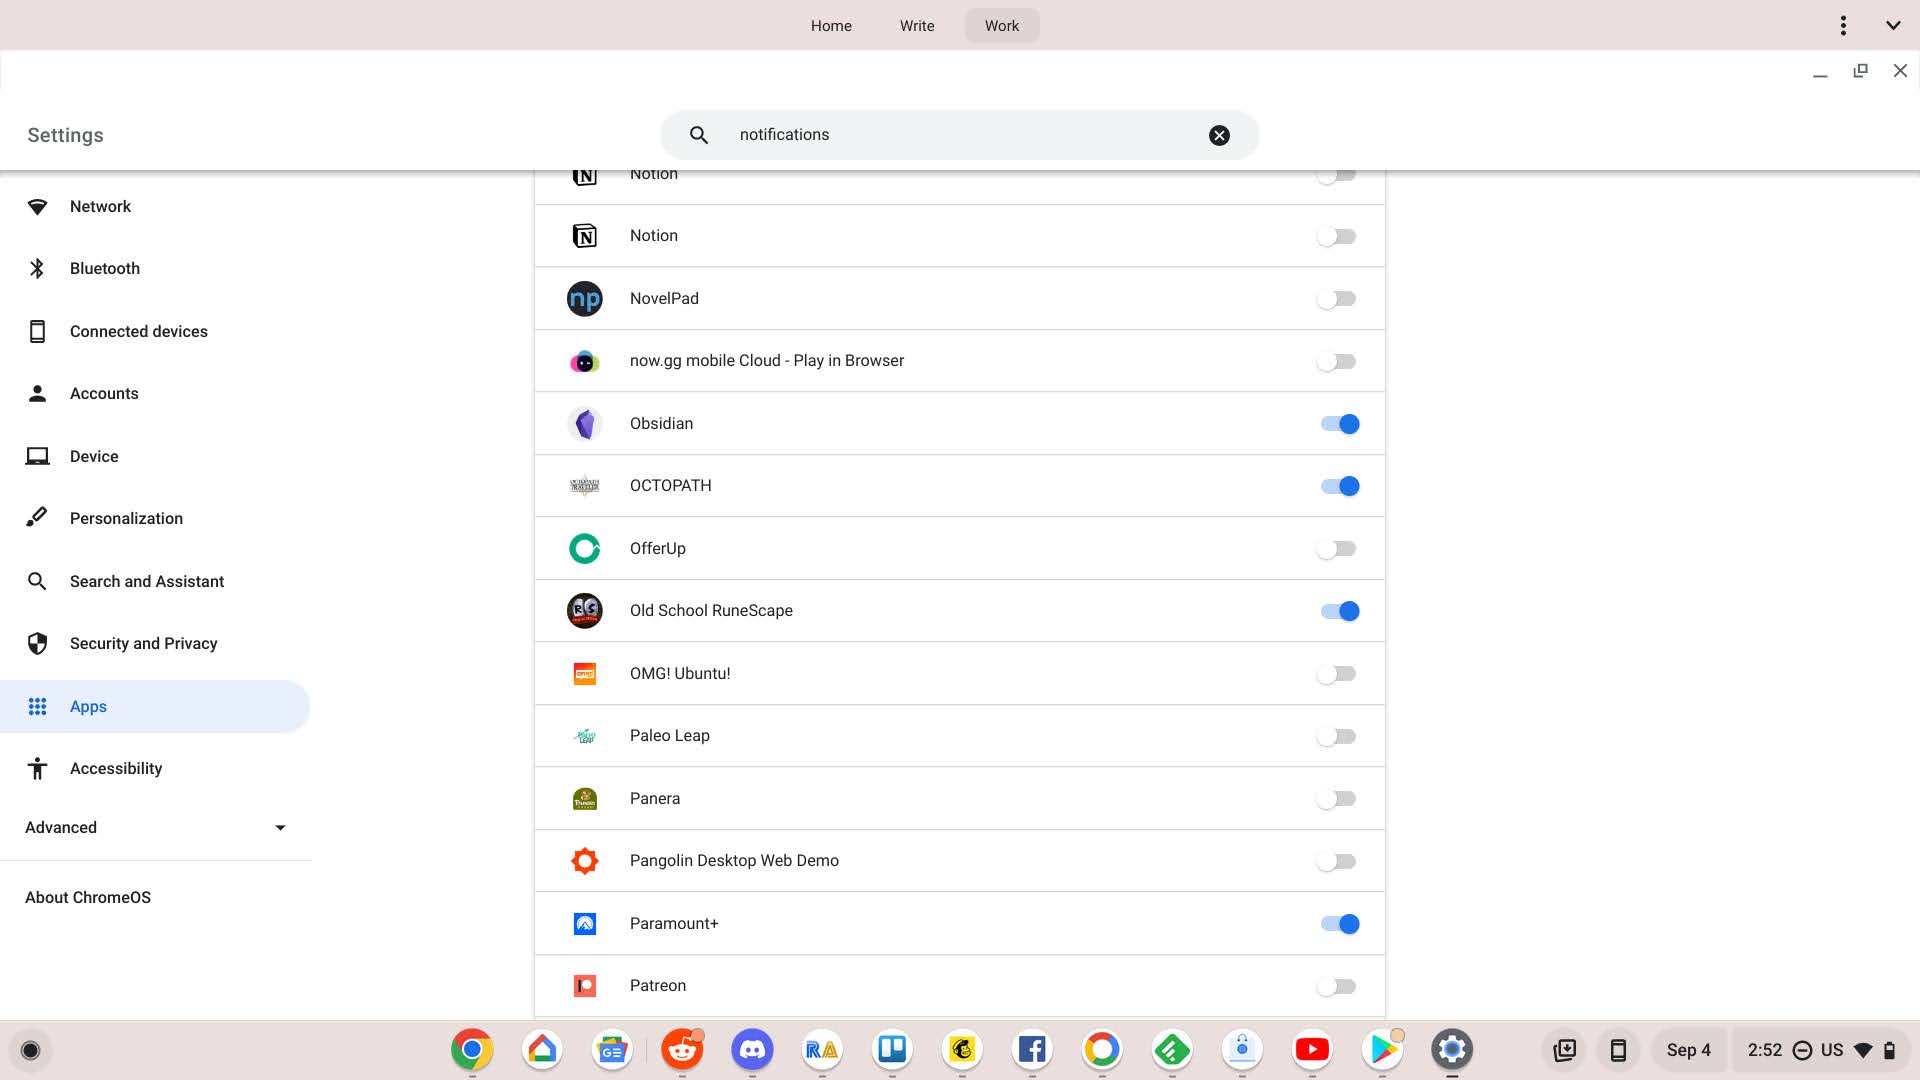
If you don’t want to hassle with the shelf, you can also simply open the Settings app on your Chromebook and navigate to “Apps > Notifications” and toggle them here, but I’ve noticed there’s no way to tell the difference between websites and apps in this section. For this reason, I prefer the method I covered first, and I hope you do too!
I just want the steps!
1. Click the clock at the bottom right of your Chromebook shelf
2. Expand the quick settings with the arrow icon
3. Click the arrow just under the “Notifications” icon or the word “Notifications” itself (not the icon!)
4. Scroll down and locate the listings marked by website URLs.
5. Click the checkboxes next to them to disable each web app
6. Alternatively, manage them via Chrome or turn them off all at once
7. Enjoy!
SUBSCRIBE TO UPSTREAM
Get Chrome Unboxed delivered straight to your inbox
Upstream is our flagship, curated newsletter with the top stories, most click-worthy deals, giveaways, and trending articles from Chrome Unboxed sent directly to your inbox a few times a week. Join 31,000+ subscribers.