


Support our independent tech coverage. Chrome Unboxed is written by real people, for real people—not search algorithms. Join Chrome Unboxed Plus for just $2 a month to get an ad-free experience, access to our private Discord, and more. Learn more about membership here.
START FREE TRIAL (MONTHLY)START FREE TRIAL (ANNUAL)
The Files app in Chrome OS is clean, simple, and does exactly what it needs to. You can find your downloads, create new folders, access Google Drive and manage your Android storage. Linux, on the other hand, may feel a bit daunting if you’re trying to see where your files and folders are living. For Linux old-timers, navigating the file system from the terminal is a breeze. However, users like myself that are still learning their way around the “secondary” Chromebook operating system can use a little help finding exactly where stuff exacts. A prime example is when you need to navigate to a specific folder in the Linux container in order to edit a file or perhaps move stuff around. If you don’t know where to look, you’re pretty much out of luck. Thankfully, most Linux distros have some form of a file manager to help you out.
The Linux container on Chrome OS is built on Debian 10, a.k.a Buster and the onboard repository happens to host a number of file managers that users can install directly from the Linux terminal. While there are many to choose from, I’ve tested a handful of popular file managers to see which one worked best on my Chromebook. I first looked to Thunar which is a very popular package used on a variety of distros. While I like what Thunar offers, it didn’t play well in the Linux container. Icons frequently failed to load and click down into a folder often caused the app to crash entirely. So, I moved on to other options. After testing out three more managers, I landed on Nemo.
Nemo
Nemo is a fork of the popular Nautilus file manager and is the official file manager for the Cinnamon desktop built for Linux Mint. Nemo can be found in the Debian 10 repository and you can install it with one simple command that you can find below. Open your Linux terminal on your Chromebook, paste the installation command and hit enter. When prompted, select “y” and enter to execute the installation. This will take a few minutes so go grab some coffee or a snack.
sudo apt install nemoOnce the installation is complete, you should have a new app in your launcher called “files” that has the Linux penguin as the icon. Alternatively, you can launch the file manager by typing nemo in the Linux terminal and hitting enter. So, what can you do with your new Linux files manager? That’s a very good question. For the general user, Nemo can be very useful in helping you find where your Linux files are installed. If you need to point the terminal to a specific file but don’t know where it is, open Nemo and start poking around. Let’s say you’re looking for the executable command for Nemo, open the file manager, and search “nemo.” You can then quickly identify which folder it lives in and where that folder is nested. This information is necessary if you want to edit files or move them from the terminal.
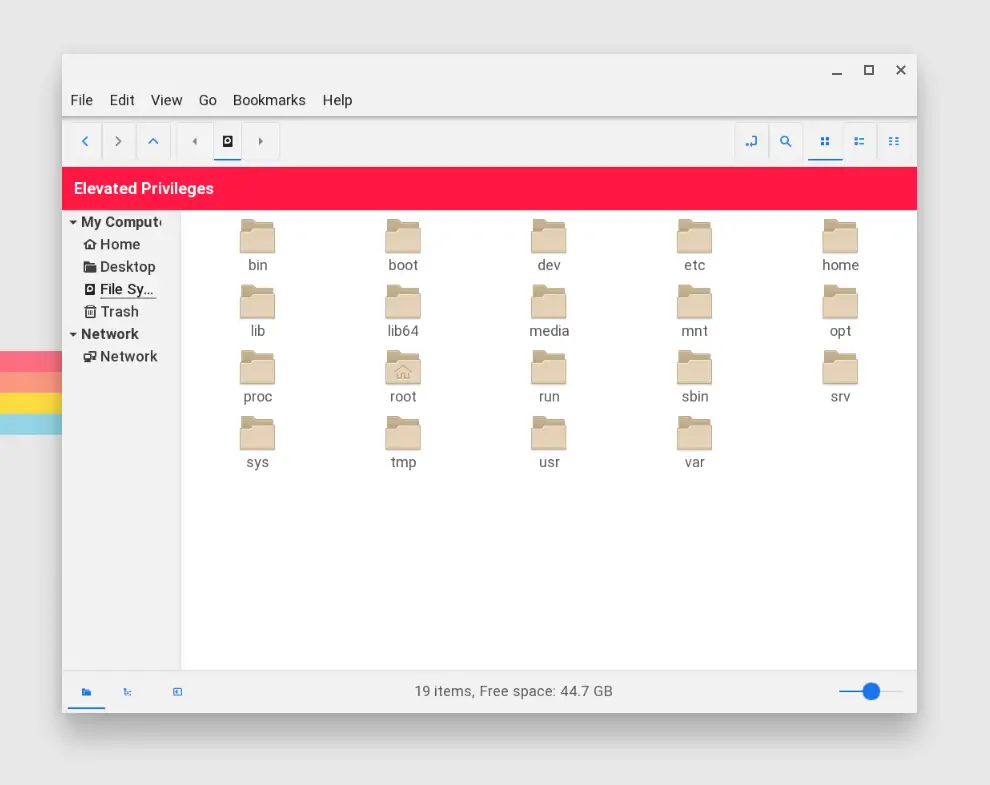
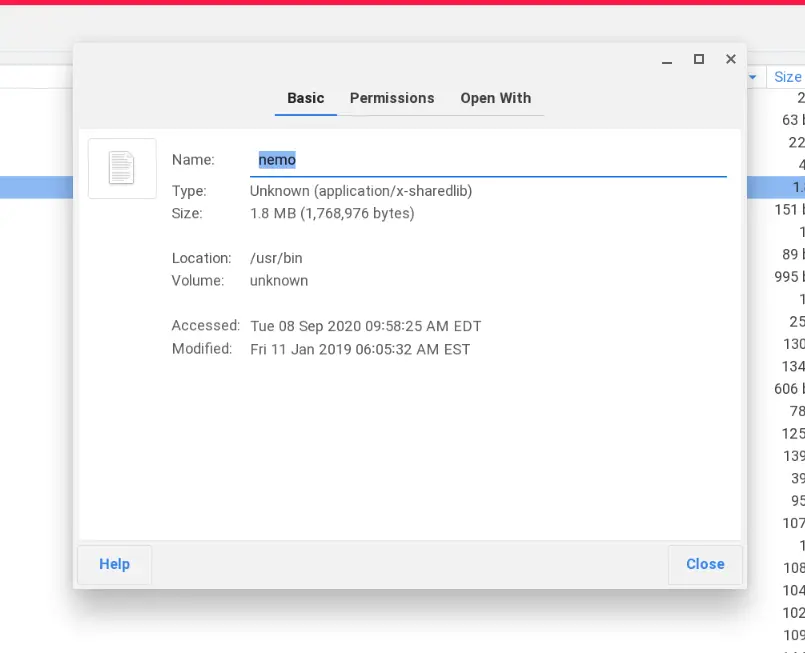
Once you find the file or folder you are looking for, you can right-click it to view its properties. As you see in the image above, the executable file for Nemo lives in the “bin” folder inside the”usr” folder. To access that folder from the terminal, you just type cd /usr/bin and hit enter. You are now working in that folder. You may notice that my Nemo file manager has a bold red bar across the top that says “Elevated Privileges.” That’s because I have opened Nemo with root privileges. By default, the file manager does not open with higher-level admin access. That’s to prevent users from accidentally borking the file system from the manager. That said, you can delete files in Nemo without root privileges but you can’t do much else. Think of it as “read-only” access but make sure you don’t right-click and delete something.
If you know what you’re doing and you want to open Nemo with root privileges, you’ll have to do so from the terminal. First, you will need to give the package access to the host. This is due to the containerized nature of Linux on Chrome OS. Next, you will open Nemo with elevated permissions using the sudo command. Do this by executing the following commands in the terminal, one at a time.
xhost +
sudo nemo
Now you can move files and folders around in the file system and that includes the Chrome OS files app if you have shared your Downloads folder with Linux. Another handy tool in Nemo is the ability to set the default application to open a file. To do so, navigate to the file you want to access and give it a right-click. Select “open with other application” and from there, you can select whatever apps you have available. For example, I can right-click an image and have it open in my Chrome browser. You can change the default application or reset to the system default. This is a very helpful tool and a great way to learn your way around Linux if you’re new, like me. If you’re a Linux guru, let us know what file manager you use. We’d love to test it out and see how it runs on Chrome OS.
SUBSCRIBE TO UPSTREAM
Get Chrome Unboxed delivered straight to your inbox
Upstream is our flagship, curated newsletter with the top stories, most click-worthy deals, giveaways, and trending articles from Chrome Unboxed sent directly to your inbox a few times a week. Join 31,000+ subscribers.