
Support our independent tech coverage. Chrome Unboxed is written by real people, for real people—not search algorithms. Join Chrome Unboxed Plus for just $2 a month to get an ad-free experience, access to our private Discord, and more. Learn more about membership here.
START FREE TRIAL (MONTHLY)START FREE TRIAL (ANNUAL)
Update: The Chrome OS team just pushed out an update to the Stable Channel. There has been no official statement as to whether this contains a fix for the Lenovo or not but I highly recommend attempting to update before proceeding with the steps below.
Update 2: According to the corresponding bug report, the update to the Stable Channel does contain the fix for the C340 Wi-Fi issues.
Chrome OS 80 has had a rough go since its delayed release at the beginning of March. Shortly after it the rolled out, the update was paused for reasons unknown only to be reinstated just a few hours later. Since then, Chrome and Chrome OS updates were temporarily paused then restarted and version 82 of the browser and the OS was abandoned as developers focused on stabilizing 80 in preparation for the update to version 81.
For the most part, Chrome OS 80 has finally gathered itself and provided a stable environment for its users and thank goodness. With so many students and employees now working at home, having a buggy PC could be an absolute nightmare. Unfortunately for some, the latter situation is currently a reality. First reported by Android Central, it appears that owners of the Lenovo C340-11 convertible Chromebook are having a very difficult time connecting to Wi-Fi. You can see from these threads on Reddit and the Chromebook support forum that the problem is widespread.
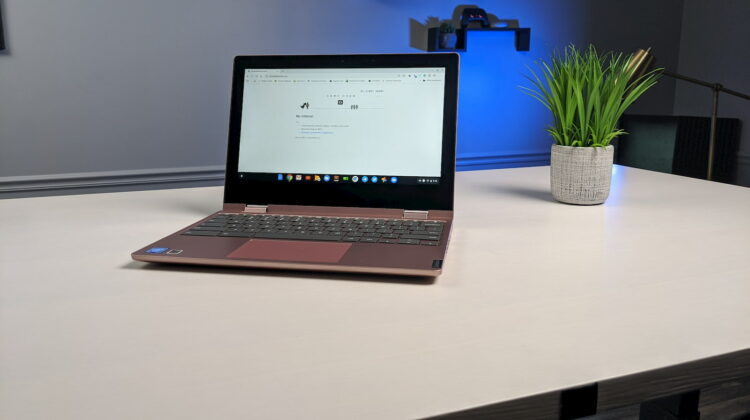
As a matter of fact, I have a Lenovo C340-11 and experienced the same issue just a couple of weeks ago but mine is in the Beta channel. It occurred to me that I hadn’t updated the Chromebook in a while and it was still on version 80. Clearly Chrome OS 80 is carrying a nasty bug that is borking Wi-Fi for the tiny convertible. It is very unusual that a single model would experience a bug like this considering so many Chromebooks are built off of the same baseboards but whatever the problem, the C340-11 appears to be the only victim.
So, what do you do?
Shop All The Latest Chromebook Deals
Well, before we cover the steps to get you back on the internet, MAKE SURE YOU BACK UP YOUR CHROMEBOOK! There are a couple of different methods to get past this bug but both of them will, at some point, powerwash your device and any local data will be lost. Now, let’s get down to business.
The easiest way to fix your Wi-Fi headache is to simply move to the Beta Channel of Chrome OS. While I don’t recommend staying in Beta, it is very stable and you shouldn’t experience any problems when you switch. That said, it is Beta software and there are no guarantees it will be bug-free. To move to Beta, head to the settings menu of your C340 and look for “About Chrome OS.” Click that tab, select “Additional Details” and click “Change channel.” Wait for the update to finish and restart when prompted. You should now be on Chrome OS Beta 81. Your data is safe but if and when you move back to Stable, you will have to powerwash and it will be wiped. It is worth noting that the Stable channel for this particular device has been reverted to 79. If you move to Beta and back to Stable, you’ll be on 79 and the Wi-Fi bug will be no more.
I know what you’re thinking. “How can I update my Chromebook if it won’t connect to the internet?” According to many of the comments in the support forum, you can get your C340 to connect if you get right next to the router or switch to the 2.4GHz signal. When I was experiencing the issue, I had to connect to my phones mobile data and the update took an hour or so because it kept dropping the signal. The other option, if you have one, is to use an Ethernet to USB adapter and hard line directly into your router.
If neither of those options will work, the method recommended by the Chromium developers assigned to this bug is to flash your Chromebook with the official image that you can download from the proxy server. If you have any connectivity with your Lenovo, you can do this from the device. However, you’re probably better served to use a different computer for this process. It can be a Chromebook, Mac or PC. You will first need to download the Chrome Recovery Utility from the Web Store. Grab that here. You will also need to download the zip file that contains version 79 of Chrome OS specifically for the Lenovo. You can download that here. IMPORTANT: You cannot use the image from the recovery tool download. It is version 80 and you’ll be right back where you started.
Next, you will need an SD card or USB flash drive. I recommend the latter but use whatever you have. It will need to have at least 4GB of storage space and it will be formatted in this process so make sure you don’t have anything you saved on the drive you don’t want to lose. Now you will want to launch the Chrome Recovery Utility you grabbed from the Web Store. Click “Get Started” and plug in your storage device. Click the gear icon at the top right of the recovery utility and select “use local image.” Select the zip file you downloaded, select the flash drive you plugged in and click “Create Now.” Sit back, maybe grab a cup of coffee. This will take a little bit. When it’s finished, eject the drive with the Files App on Chrome OS or whatever the comparable action is on PC or Mac.
On to the Lenovo C340. From the login screen, press and hold the Escape and Refresh keys then push the power button. Release the power button and when you see “Please insert a recovery USB stick or SD card” release the other two keys. Insert your newly created media and let the process get moving. The Chromebook may not appear to be doing anything at first but give it a minute and the screen should go black. Now the recovery process will start and you should see a progress bar displayed on the screen. Once it has successfully completed, you will be prompted to remove the flash drive to complete the setup. The Chromebook will reboot and you should be able to set it up like any new device.