

Support our independent tech coverage. Chrome Unboxed is written by real people, for real people—not search algorithms. Join Chrome Unboxed Plus for just $2 a month to get an ad-free experience, access to our private Discord, and more. Learn more about membership here.
START FREE TRIAL (MONTHLY)START FREE TRIAL (ANNUAL)
Ah, the age-old question. You got a Chromebook but you are also an Apple user and you want to access your iTunes library on your shiny, new Chrome OS devices. Unfortunately, Apple has yet to – and likely never will – release an Android version of iTunes. Many users have made the move to Apple Music and are content using the Play Store version or simply navigating to Apple Music on the web. However, there are many that have an extensive iTunes library and still others use the storefront on a regular basis for purchases and media consumption. Wouldn’t it be nice if you could install iTunes on your Chromebook?
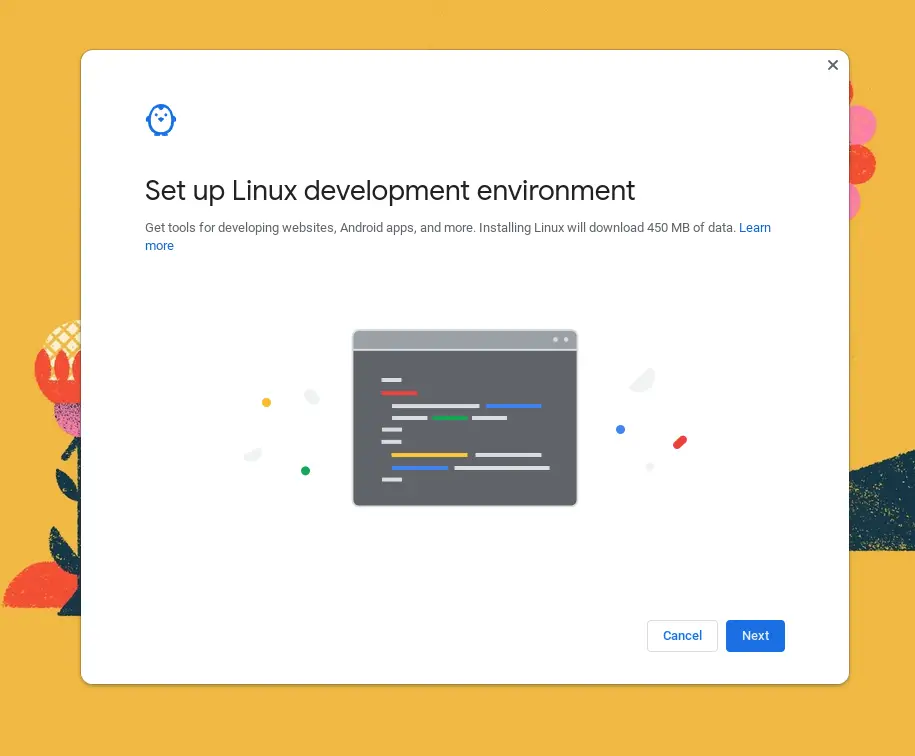
Well, where there’s a will, there’s a way and that way is via the Linux container on Chrome OS. Obviously, Apple has its own iTunes apps for iOS and macOS but the company also offers a Windows version of iTunes and that’s the path we’ll take to get the application on our Chromebook. First, you’ll need to ensure that your Chromebook supports Linux apps. To do so, simply head to the Chrome OS settings menu in the system tray. Click the gear icon and in the settings menu, click advanced. Click “Developers” and select the “turn on” button to install the Linux environment.
Setting up Linux to get iTunes for Chromebook
The first time you enable Linux on your Chromebook, you’ll be prompted to set a username and select the amount of storage you wish to allot for Linux. Keep in mind, whatever amount of storage you give to Linux will be taken from the Chrome OS side. If you have a device with little storage, you’ll want to keep this amount just enough to install the Linux apps you’re using. (Don’t worry, you can adjust the amount of allocated storage later if needed.) I have half a terabyte so I set mine to roughly 200GB. Your username, by default, will be the same as your default Chromebook login without the @gmail at the end. You can make it whatever you like but remember what you use because we’ll need it later for the iTunes installation. Let this process run its course and when it’s done, the Linux terminal will pop up and we’re ready for the next steps.

Now that you have Linux installed, we need to make sure all of our packages are up-to-date. This can be done in your newly-launched Linux terminal. If you inadvertently closed it, you can find the Terminal app in your app launcher. Just click the icon and wait for the terminal to open. In the terminal, paste or type the following commands and hit enter. (To paste, simply copy the text and right-click anywhere inside the terminal.
sudo apt update && sudo apt upgrade -yTo run the Windows version of iTunes on Chrome OS, we will need the 32-bit version of iTunes which can be downloaded here. To run an executable Windows file in Linux, we will need to install a compatibility layer. In this instance, we will use the popular Wine package for Linux. Don’t worry. The steps are relatively simple and if something goes wrong, the Linux container can easily be deleted and we can start over. Once you have the iTunes setup file downloaded, open your Files App and move it to the Linux folder. You can rename the file if you like but by default, it will look like this: iTunesSetup.exe. Now we’re ready to start the process of installing iTunes.
Install Wine
First, you will need to install the Wine Linux package and then, add the 32-bit architecture to your Linux container. Do this by executing the following commands in your Linux terminal, one at a time.
sudo apt-get install wine
sudo dpkg --add-architecture i386
Next, we need to update any new packages and install the 32-bit version of Wine so that it will work with our version of iTunes. Run these two commands, one at a time, in your Linux terminal.
sudo apt update
sudo apt-get install wine32
Run iTunes Setup
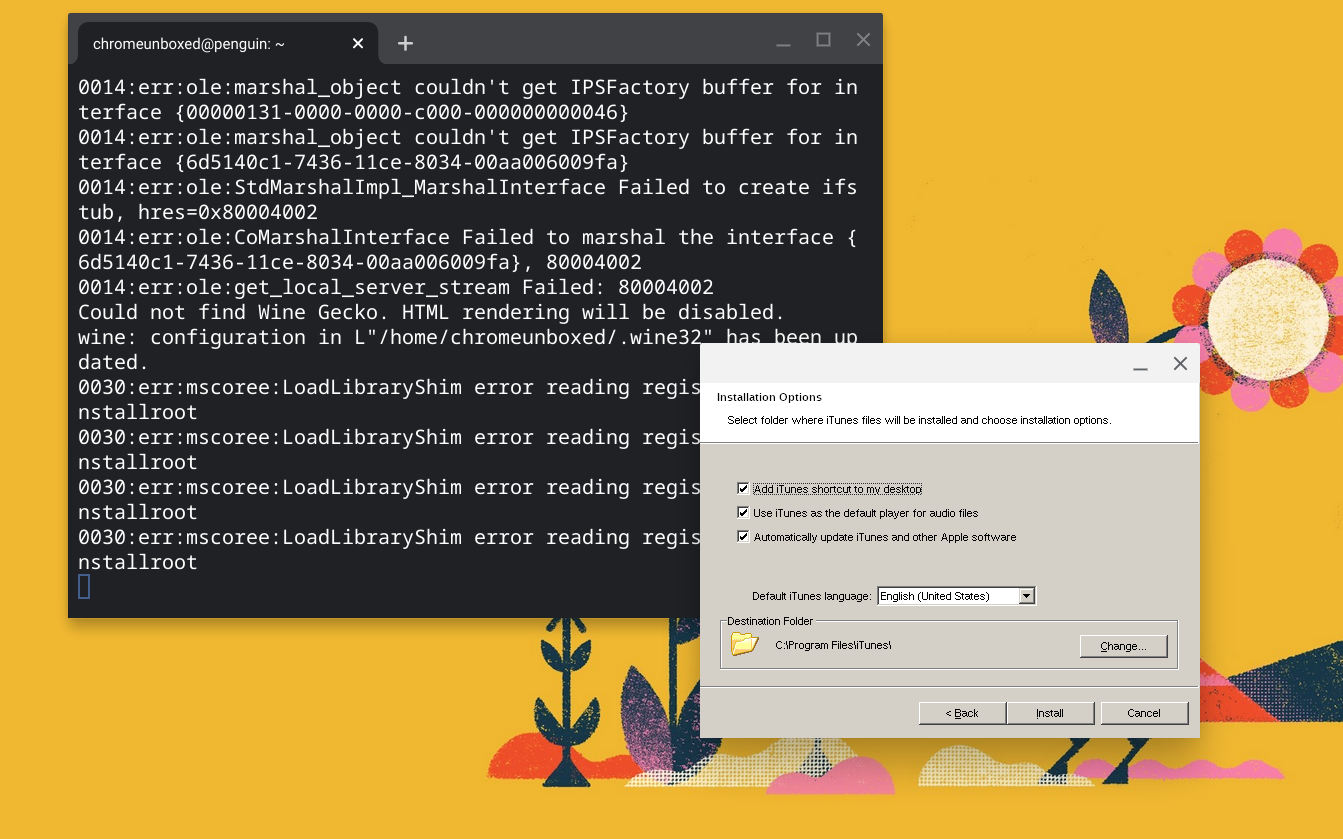
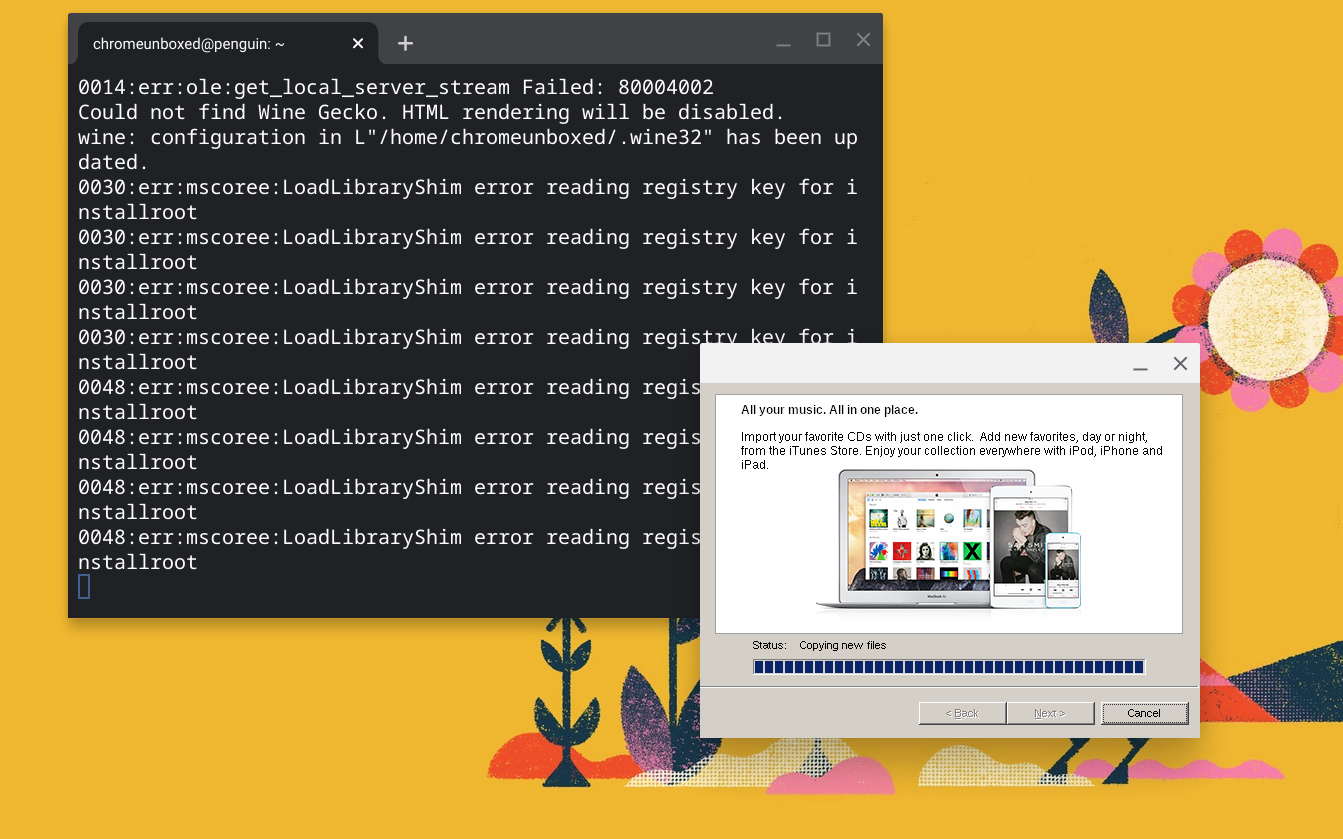
Now that you have Wine installed and ready to go, we will use the compatibility application to run the iTunes setup file. To do this, run the following command in your Linux terminal, replacing “username” with your actual Linux username that you set up when enabling Linux. Use the two commands below, one at a time. If you renamed the iTunes setup file, don’t forget to change it in the command along with your username. During the setup, you will be prompted that “Auto run” is not enabled. Click yes to enable that feature.
sudo apt update
WINEARCH=win32 WINEPREFIX=/home/username/.wine32/ wine iTunesSetup.exe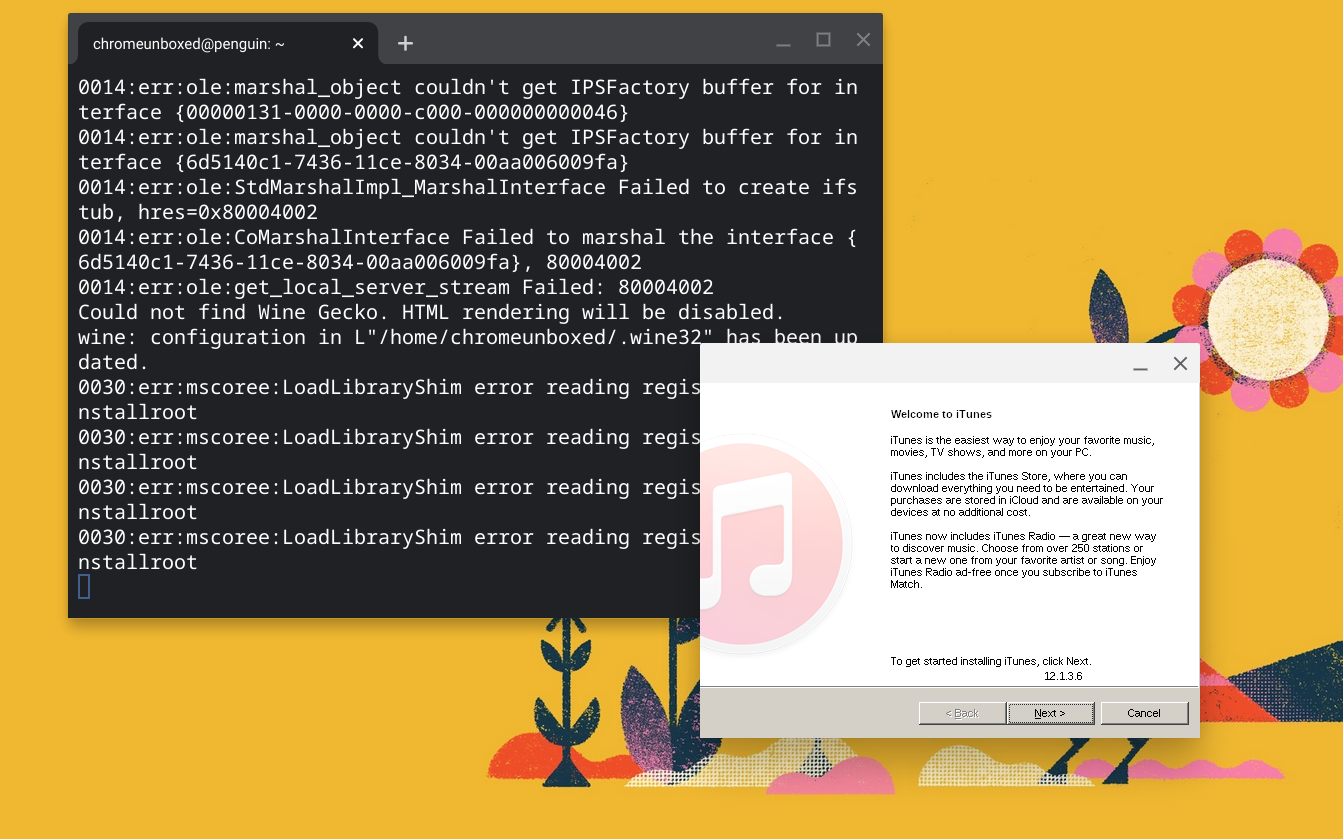
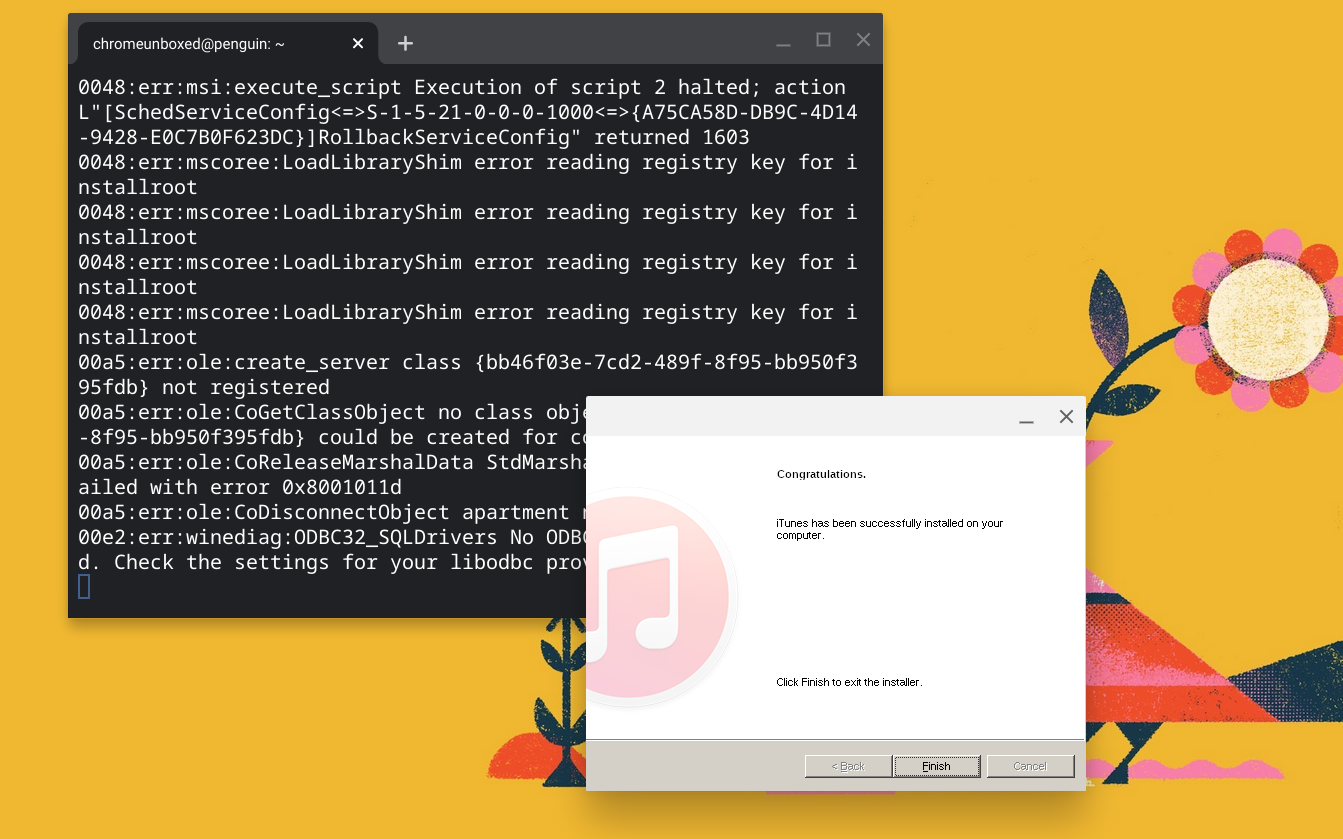
You now have iTunes installed on your Chromebook and the app icon should be in your app launcher. However, the path to execute the iTunes.exe file needs some tweaking before Wine can launch the application. To do this, we need to modify the iTunes.destkop file. You can find this by opening the Linux folder in your Files app. Click on the three-dot menu at the top right and select the “show hidden files” option. Now, click through the following folders to find the iTunes.desktop file.


Local>share>applications>wine>Programs>iTunes. Right-click on the iTunes.desktop file and select “open with Text” to open in the text editor. Line three should contain an Exec command. Replace all of line three(3) with the following text and save the file. Don’t forget to replace “username” with your Linux username.
Exec=env WINEPREFIX="/home/username/.wine32" wine "/home/username/.wine32/drive_c/Program Files/iTunes/iTunes.exe"Launch iTunes on your Chromebook
You are now all set to run iTunes on your Chromebook. Clicking the app icon in the app launcher will fire up iTunes and you can log in with your Apple ID to access the store and your Library. I did get a warning that my connection may not be secure but you can click continue and dismiss the warning. Speaking of warnings, this isn’t a beautiful solution. I’m running on an 11th Gen Core i7 Chromebook with 16GB of RAM and iTunes still bogged down my device because it is running through so many layers and it isn’t technically designed for Linux. Still, it does work and it’s a viable option if you need to access your iTunes library in a pinch. Personally, I’d recommend switching over to Apple Music or YouTube Music as iTunes is feeling more and more antiquated as time goes on.
SUBSCRIBE TO UPSTREAM
Get Chrome Unboxed delivered straight to your inbox
Upstream is our flagship, curated newsletter with the top stories, most click-worthy deals, giveaways, and trending articles from Chrome Unboxed sent directly to your inbox a few times a week. Join 31,000+ subscribers.