

Support our independent tech coverage. Chrome Unboxed is written by real people, for real people—not search algorithms. Join Chrome Unboxed Plus for just $2 a month to get an ad-free experience, access to our private Discord, and more. Learn more about membership here.
START FREE TRIAL (MONTHLY)START FREE TRIAL (ANNUAL)
With Google Cloud Print getting the axe on December 31, 2020 – yes, that is just a few weeks from now – Chromebook owners will need to begin making use of standard wireless printing. Since we’ve already done a walkthrough on how to set that up for regular users, we thought it appropriate to help IT admins for schools and businesses do the same. The process is definitely quite different, but it’s also fairly painless, especially with us as your guide. Just follow the steps below and you’ll be able to enable wireless printing to your fleet of on-site or remote Chromebooks in no time!
First, you’ll need to check to see if printing permissions are even enabled via your Google Admin Console. Because many printers didn’t work with Chromebooks in the past due to manufacturers choosing not to make drivers for Google’s OS, most businesses and schools have opted for Google Cloud Print in the past. There’s a good likelihood that your settings currently reflect this as well, so let’s get started.
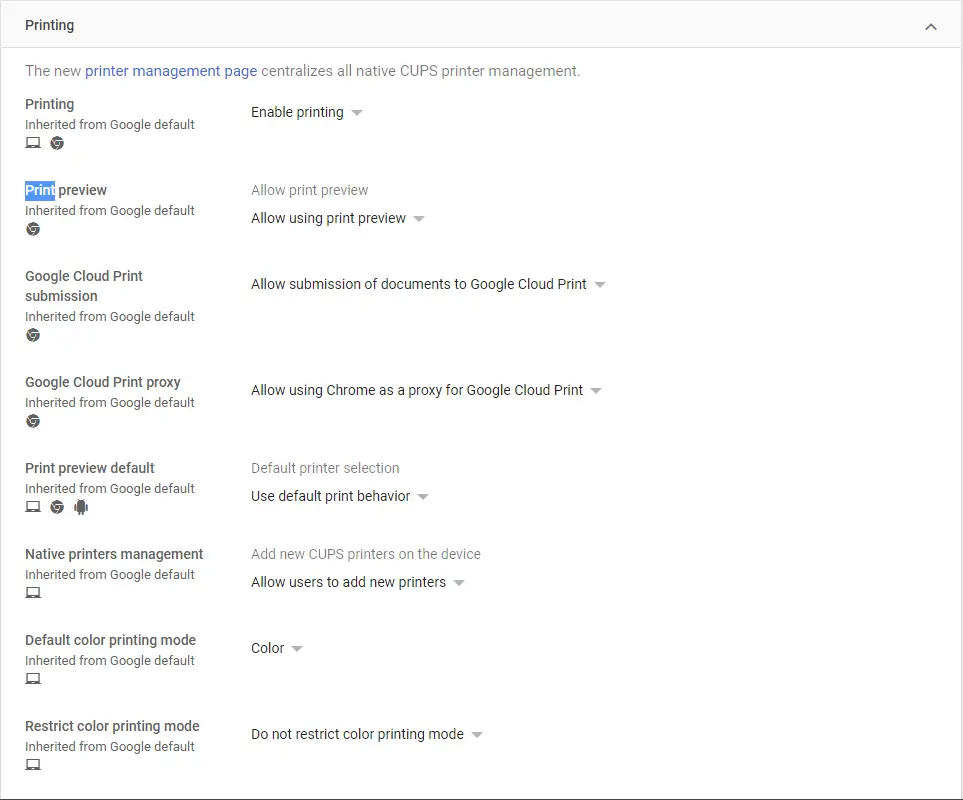
In order to turn wireless printing on, just go to your Google Admin console, visit Devices > Chrome Devices > User & Browser Settings, and then scroll down until you see the Printing section. If you’re having a hard time finding it, just press CTRL+F on your keyboard to quickly search for where it’s at down the page. Make sure you choose the first drop-down in the category and select ‘Enable printing’. After that, you can look at all of the various printing-related options and adjust them to your liking or needs.
Devices > Chrome Devices > User & Browser Settings > Printing
Next, you’ll need to enroll printers into your domain so that Google knows which organizational units are allowed to use which devices. In order to do this, simply visit the Devices menu from your Admin console’s home screen and then click on Chrome, which is listed on the top left, and lastly click Printers. You can also specify from here whether or not a printer is allowed to be used by guests and which of the printer’s features can be used by each individual or group.
Devices > Chrome > Printers
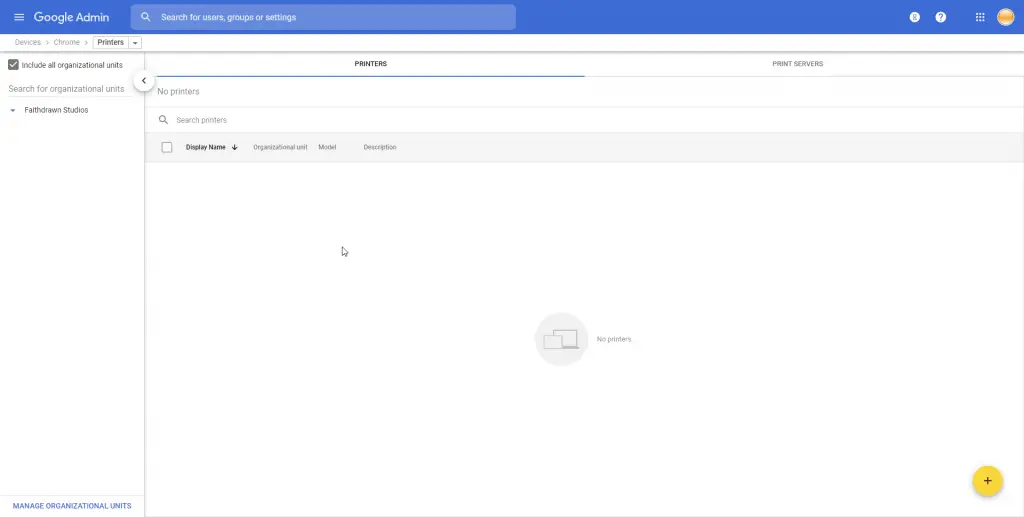
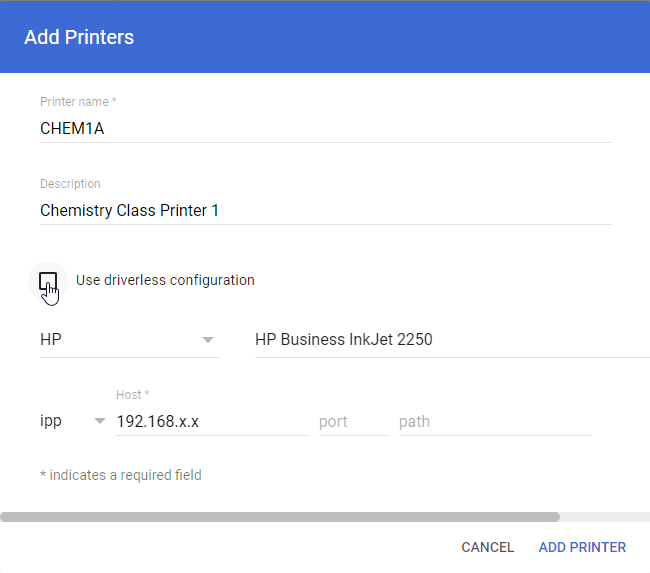
To get started with printer enrollment, just click the yellow plus button on the bottom right side of the printer enrollment screen. Then, you’ll need to give your printer a name and a description. Make sure that the description helps you understand where the device is positioned physically, such as the classroom number or building name. Next, select the manufacturer and the model number of that printer and enter its IPP or ‘internet printing protocol’. You can also select the ‘ipp’ drop-down and choose a different address type such as ipps, Lpd, HTTP, HTTPS, or socket. If your printer uses a specific port or path, you can fill that out as well. Should you just want basic printing capabilities, you can choose the ‘Use driverless configuration’ checkbox before clicking the blue ‘Add Printer’ text at the bottom right of this dialogue box.
Yellow + sign > Add Printer > Fill out required fields > select ‘Add Printer’
Once your printer is listed in your Admin console, it’s absolutely critical that you click on its name and enable it for specific organizational units using the menu that opens up on the right side of the screen. This will allow you to control who has access to it – be it teachers and not students or managers and not employees! If you have not set up organizational units yet, we highly recommend you do so before finalizing your printer enrollment.
We hope this helps you transition your organization to wireless printing and survive the death of Google Cloud Print! If you have any questions about this setup or are unsure of anything, don’t hesitate to ask us in the comments section! Good luck!
SUBSCRIBE TO UPSTREAM
Get Chrome Unboxed delivered straight to your inbox
Upstream is our flagship, curated newsletter with the top stories, most click-worthy deals, giveaways, and trending articles from Chrome Unboxed sent directly to your inbox a few times a week. Join 31,000+ subscribers.