


Support our independent tech coverage. Chrome Unboxed is written by real people, for real people—not search algorithms. Join Chrome Unboxed Plus for just $2 a month to get an ad-free experience, access to our private Discord, and more. Learn more about membership here.
START FREE TRIAL (MONTHLY)START FREE TRIAL (ANNUAL)
Now that Chrome OS is offering an official Windows Desktop via Parallels, Enterprise customers have a fully-supported and very viable way to access legacy applications while still embracing the cloud. That’s all fine and well for companies that have the means to purchase high-end Chromebooks along with licenses for Windows and Parallels but not so much for us common folk. Lucky for us – where there’s a will, there’s a way and we have a way.
In the early days of Chrome OS, running a separate operating system meant putting your device in developer mode and jumping through a bunch of hoops to essentially dual boot a version on Linux on your machine. In all honesty, the process isn’t that difficult and when you’re finished, you have a fully-functional version of Linux running side-by-side with Chrome OS. The main drawback – aside from the technical expertise required – was the fact that developer mode technically makes a Chromebook less secure and it throws out any and all support you may get from Google should you brick your machine.
Enter Crostini
Thankfully, Google decided to fire up a little project that we know as Crostini. For the common user, this is the Linux (Beta) project that allows users to install and run a variety of Linux packages and applications on Chrome OS without the vulnerability of moving to dev mode. To oversimplify it, Crostini runs a Debian 10 Linux framework in a container on Chrome OS which is then accessed via a virtual machine. The Linux application is running on the bare metal of the Chromebook while still sandboxed to protect the rest of the system. The virtual machine is the gateway to the application that allows you to access it from the host, Chrome OS.
Over the past couple of years, I have experimented with various ways to leverage Linux on Chrome OS. We’ve installed a wide range of useful Linux packages and even figured out how to run a full Linux desktop environment. In the midst of all the tinkering, the subject came up of running a virtual machine inside of the Linux container. So, I decided to give that a try. My first attempt led me to the widely used VirtualBox VM but unfortunately, it requires custom Linux headers and Chrome OS prevents those from being installed for security reasons. So, I moved on to Virtual Machine Manager which is a similar application that allows you to install and run a variety of operating systems using .iso images. I successfully installed Windows 10, PopOS, Elementary OS, and a few others. The installation process is fairly straightforward but there are a couple of extra steps required because the VM is using Linux as a host which in turn uses Chrome OS as a host. It all has a real Inception feel to it if you know what I’m saying.
Unbeknownst to me, there’s another VM application that was right there in the Debian repository this whole time, and this weekend, I received an email asking for a little help getting it to work. Gnome Boxes, is “A simple GNOME application to view, access, and manage remote and virtual systems” and you can install it on a Chromebook with one simple command. The problem with Gnome Boxes, like that of Virtual Machine Manager, is that it requires some extra permissions for Chrome OS to be the host. It also requires installing qemu and some other dependencies. That said, a little tinkering and a couple of hours later and I was able to get Gnome Boxes up and running.
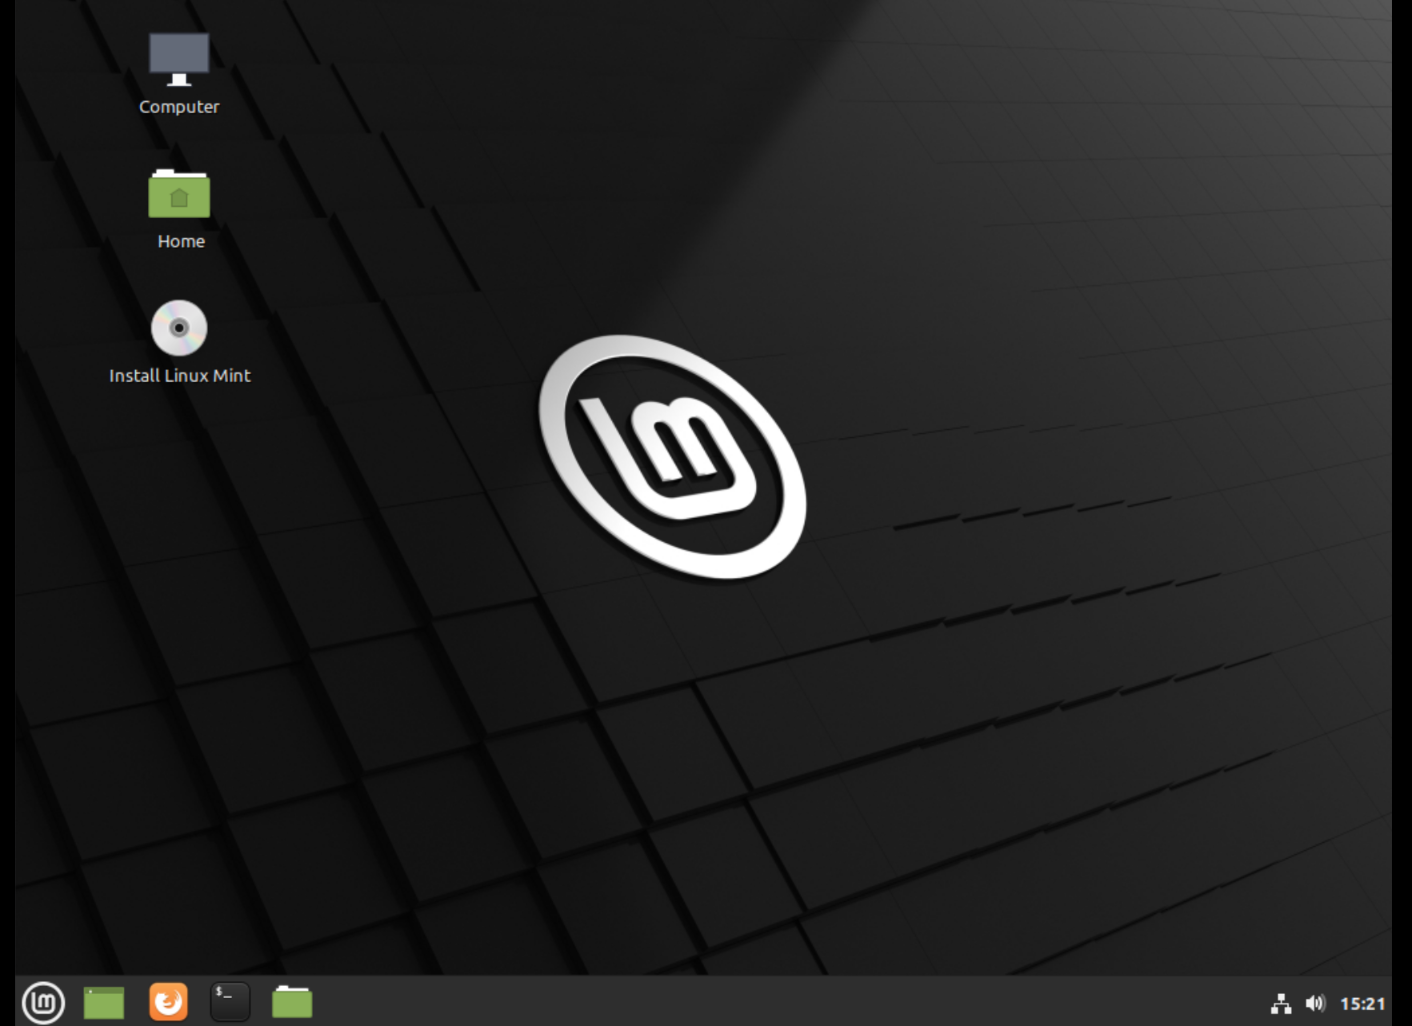
The process is very similar to using Virtual Machine Manager and I can’t really say whether one is better than the other. However, Gnome Boxes on Chrome OS does require installing a text editor and editing two lines of qemu’s .config file. If you aren’t comfortable with that, you probably want to go the way of Virtual Machine Manager. First, you will need to decide which operating system you are wanting to install. Once you’ve downloaded your image, move it to the Linux folder in your Files app. This will make it easier to find and prevent any permission conflicts. For testing purposes, I downloaded the Windows 10 .iso from Microsoft and the image for Linux Mint. I did try a couple of other operating systems. I will tell you upfront, some work and some do not. It’s a grab bag. Linux Mint is great because you can run the full OS from the image before you install it. This is great if you just want to try it out but aren’t necessarily ready to give up precious hard drive space for the longterm. Anyway, let’s get to it.
To get your Chromebook ready for Linux apps, check out our getting started article here. Once you’re set-up, we can install our text editor and all of the needed dependencies in one fell swoop with the following command. I use the nano text editor. If you prefer gedit or another, simply replace nano in this command. Paste this into your Linux terminal and press enter. Wait for the installation to complete and then we’ll move to the next steps.
sudo apt install qemu-kvm libvirt-clients libvirt-daemon-system bridge-utils virtinst libvirt-daemon nano -yNext, you need to install Gnome Boxes. This package is available in the Debian 10 repository and you can install it from the command line with the following command. Once installed, don’t launch it from the app launcher. For Chrome OS, it will need to be launched with sudo from the command line to have the permissions needed to run. This can be added to the icon in the launcher later but that’s a how-to for another time. Paste this command to install the package.
sudo apt install gnome-boxesNow we need to edit the qemu.conf file. Don’t panic. It’s very simple. First, you need to navigate to the folder where the file lives. If you installed everything properly, it will be in the “libvirt” folder that is nested under “etc” and you can point your terminal there with the following command. Once there, you can open the qemu.conf file with the nano text editor using the second command.
cd /etc/libvirt
sudo nano qemu.conf
You should now be looking at a text file for qemu. You will need to scroll down until you see the text “Since a sequence of digits is a valid user name, a leading plus sign can be used to ensure that a user id will not be interpreted as a user name.” Below that, you should see two options for “user” and “group” and they will be commented out. That means that they have a # in front of them. Arrow down to those lines and, one at a time, delete the #. The lines should go from green to white.

Once you’ve deleted those, hit “Ctrl+X” to exit and hit enter to save the file and close it. We’re almost done. I promise. Now we need to give Gnome Boxes access to the host display, Chrome OS. In the terminal, type cd and hit enter to return to your command prompt. Now, type the following command and hit enter. The output should look like this: access control disabled, clients can connect from any host.
xhost +You’re all set. To launch Gnome Boxes, type sudo gnome-boxes in the terminal and hit enter. Once it launches, you can create a new VM with some of the preloaded Linux systems it offers or you can choose “select a file” and pick the .iso you downloaded earlier. The installation process will start and you will be walked through the process relevant to the operating system that you’re installing. For Linux Mint, the OS will launch very quickly since it’s running directly from the disk image. On the desktop, you will have the option to go ahead and install the OS on your device. The new installations will then show up on your Gnome Boxes desktop for you to access at your leisure. Pretty cool stuff.
Stay tuned for more how-tos, tips and trick on using Linux on Chrome OS. We’ve only scratched the surface.
SUBSCRIBE TO UPSTREAM
Get Chrome Unboxed delivered straight to your inbox
Upstream is our flagship, curated newsletter with the top stories, most click-worthy deals, giveaways, and trending articles from Chrome Unboxed sent directly to your inbox a few times a week. Join 31,000+ subscribers.
Shout out to Vijay for introducing me to Gnome Boxes and sending me down the rabbit hole.