We have been tinkering around with the latest Stable release of Chrome OS for about a week now and despite version 88 being relatively slim on “official” new features, there are still some hidden gems that you may be interested in trying. Probably the most exciting and highly-anticipated new feature of Chrome OS is the new screen recording tool that we highlighted over the weekend. While the screen capture feature is still a work in progress, you can try it out right now in Chrome OS 88 by simply enabling the feature flag.
Another equally useful (perhaps not quite as exciting) feature hiding behind a flag in the latest Stable update is the Chrome OS scanning app that we have been tracking since March of 2020. A recent update to the Canary channel of Chrome OS implemented a working version of the scanner’s image preview and fixed the ability to scan a document to PDF. This will be a very welcome feature for business types that need to create a PDF document for signatures and what have you. Those two features are still absent in the Stable channel but that doesn’t mean that you can go ahead and enable the scanner.
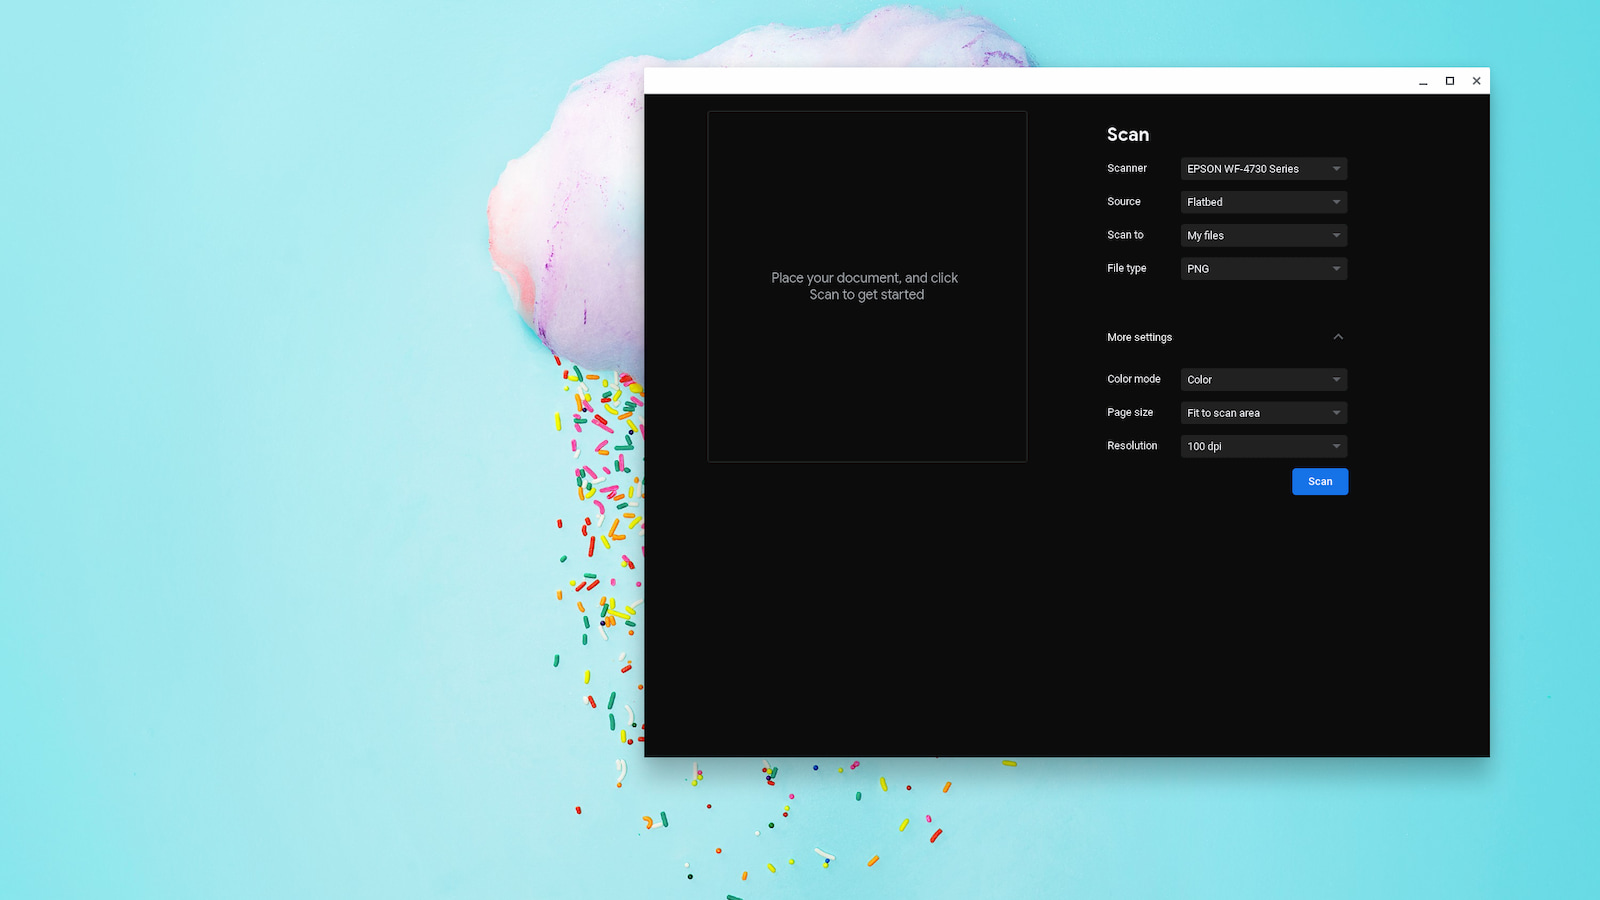
To enable the native scanner, you simply need to point your browser to the Chrome flags page at chrome://flags and search for “scanning.” Alternatively, you can head directly to the flag with the URL chrome://flags/#scanning-ui. Switch the dropdown to “enabled” and then, click the restart button at the bottom-right of your browser. After a quick reboot, you should be able to find a new “scan” icon in your app launcher.
To use the new scanning tool, you will need to make sure you have a network printer set up that already works with your Chromebook. You will also have to be on the same Wi-Fi network as the printer when you are ready to scan. Depending on your printer/scanner, you may be able to use the flatbed or the document feed. The HP Envy 6400 we have here in the office works with either method. When you open the Scan app, you will be able to see any printers that are available on the network. Each printer will give you a list of options such as paper size, dpi, color settings, and where you would like to save the file. By default, the scan will be saved in the My Files folder in your files app. That’s it. You can now scan documents with your Chromebook without the need for a third-party app or any online tools. Very cool.
Newsletter Signup

Leave a Reply
You must be logged in to post a comment.