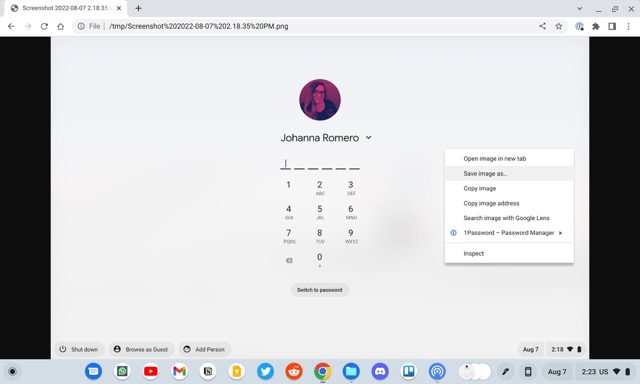
It doesn’t come up often, but there may be times when you need a screenshot of your Chromebook’s login page. Whether it is to capture an error message or to have a clean image of it for documentation, most of the time most people resort to just taking a picture of it. However, there is a better way.
The good news is that you can take a screenshot of your login screen the same way you would any other page on your Chromebook. The difference is that the screenshot will not be saved in your Downloads folder as a regular one does, but rather in a temporary directory. Here’s how you can capture this image and save it to a permanent folder:
Take the screenshot by holding down CTRL and then pressing the overview ![]() key (or F5 if you’re using a non-ChromeOS keyboard). Next, log in to your Chromebook as usual and we’ll proceed from there.
key (or F5 if you’re using a non-ChromeOS keyboard). Next, log in to your Chromebook as usual and we’ll proceed from there.
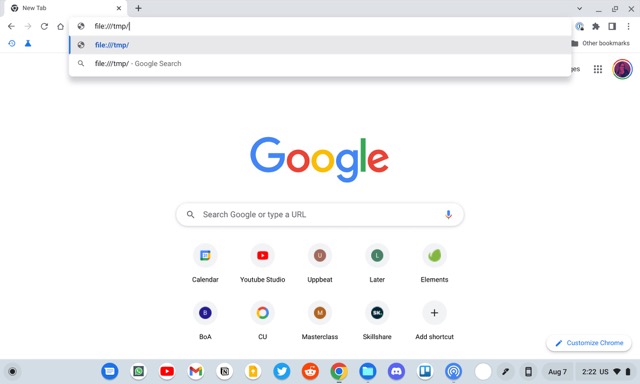
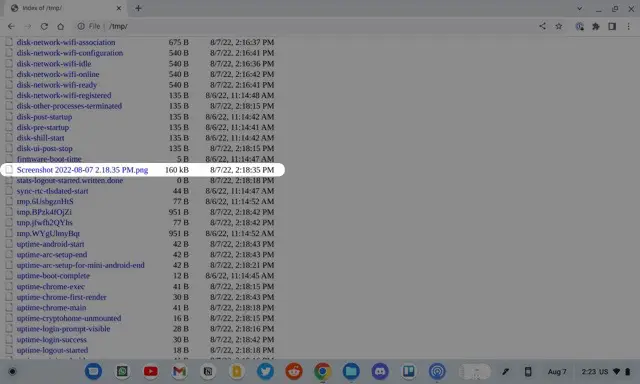
Once you are logged in, open the Chrome browser and type in file:///tmp/ into the address bar. This will take you to the directory where files are temporarily saved on your Chromebook. Scroll down the list of files until you find one that begins with the file name “Screenshot” followed by the date and time of the file creation. Click on the file name, which will open the image inside of the browser window.


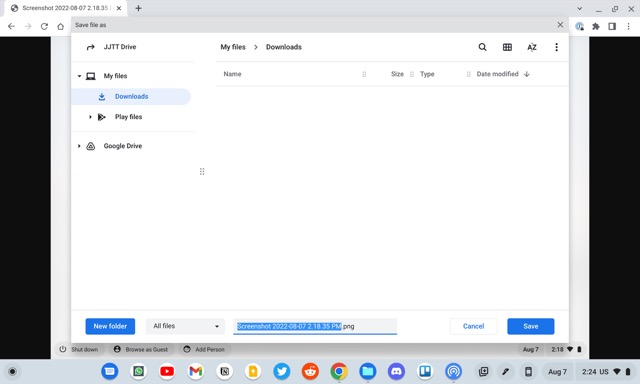
Once you have the image open, right-click on it and save it to your favorite location. This will ensure that you get it to keep it permanently as temporary files are, as their name implies, only available temporarily.


I just want the steps!
- Take your screenshot as you normally would.
- Log in to the Chromebook.
- Open the Chrome browser.
- Type in
file:///tmp/into the address bar.- Look for a file that starts with the title “Screenshot,” followed by the date, and click on it to open it.
- Once the image is open, right click on it, and save it to your preferred location.

