


Support our independent tech coverage. Chrome Unboxed is written by real people, for real people—not search algorithms. Join Chrome Unboxed Plus for just $2 a month to get an ad-free experience, access to our private Discord, and more. Learn more about membership here.
START FREE TRIAL (MONTHLY)START FREE TRIAL (ANNUAL)
It’s no secret that most Chromebooks don’t come with a lot of internal drive space, so for those of us who are file hoarders – or simply like to maintain a thorough media library – we have to resort to other external storage options. But what if that external storage is in the form of another device you have at home – like a Mac or a PC – or a NAS (Network Attached Storage) and you want to be able to view or edit these files on your Chromebook while you are still on your local network?
Back in the day, you were only able to achieve this by downloading a Google-created extension called “Network File Share“, but that extension has since then been taken off the Chrome Web Store and has been replaced with a feature built right into the Chrome OS Files app.
Sharing files back and forth between my Chromebook and my Mac Mini is something I do on a regular basis. Sure, you can use Google Drive for this as well, but I find it works faster to share a file directly within my local network rather than having to upload it to the cloud only to then download it again.
That said, follow the guide below if you’d like to set this up for yourself.
Make sure the folder you want to map is shared
On Mac
Go to System Preferences, then click on Sharing. Select the File Sharing service from the left and click on Options.
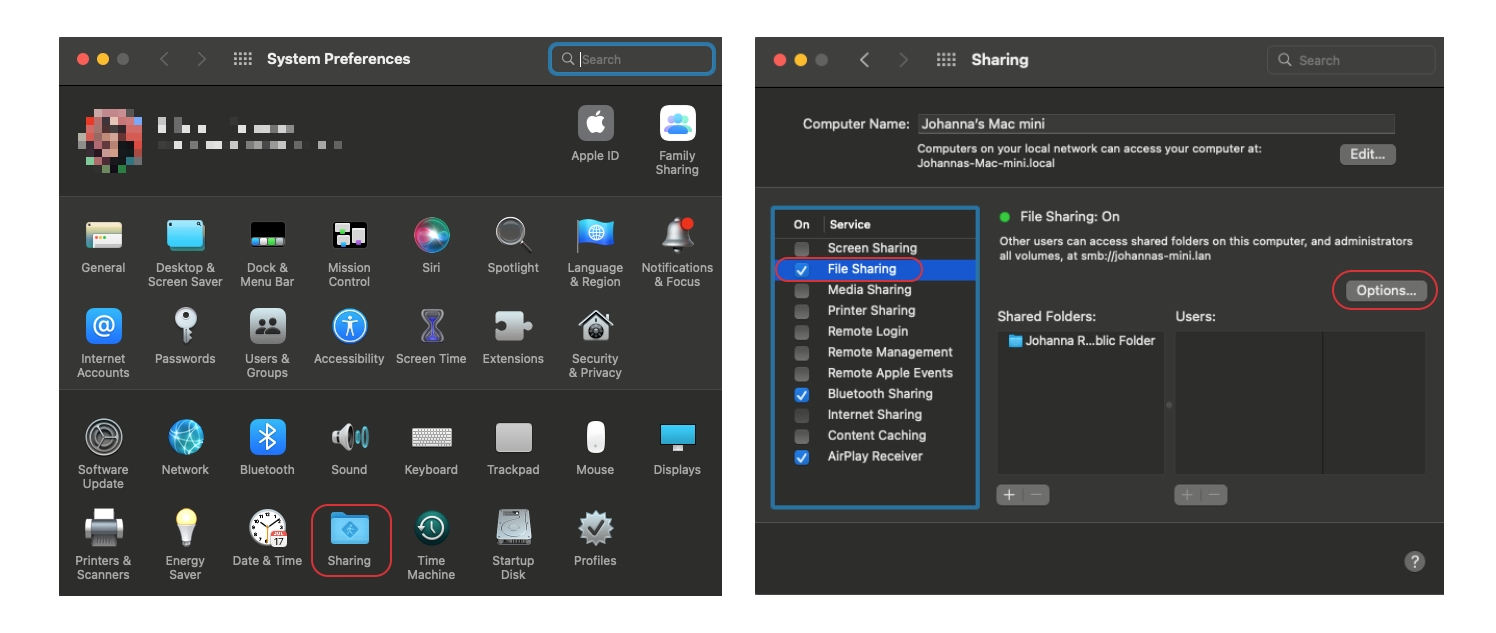
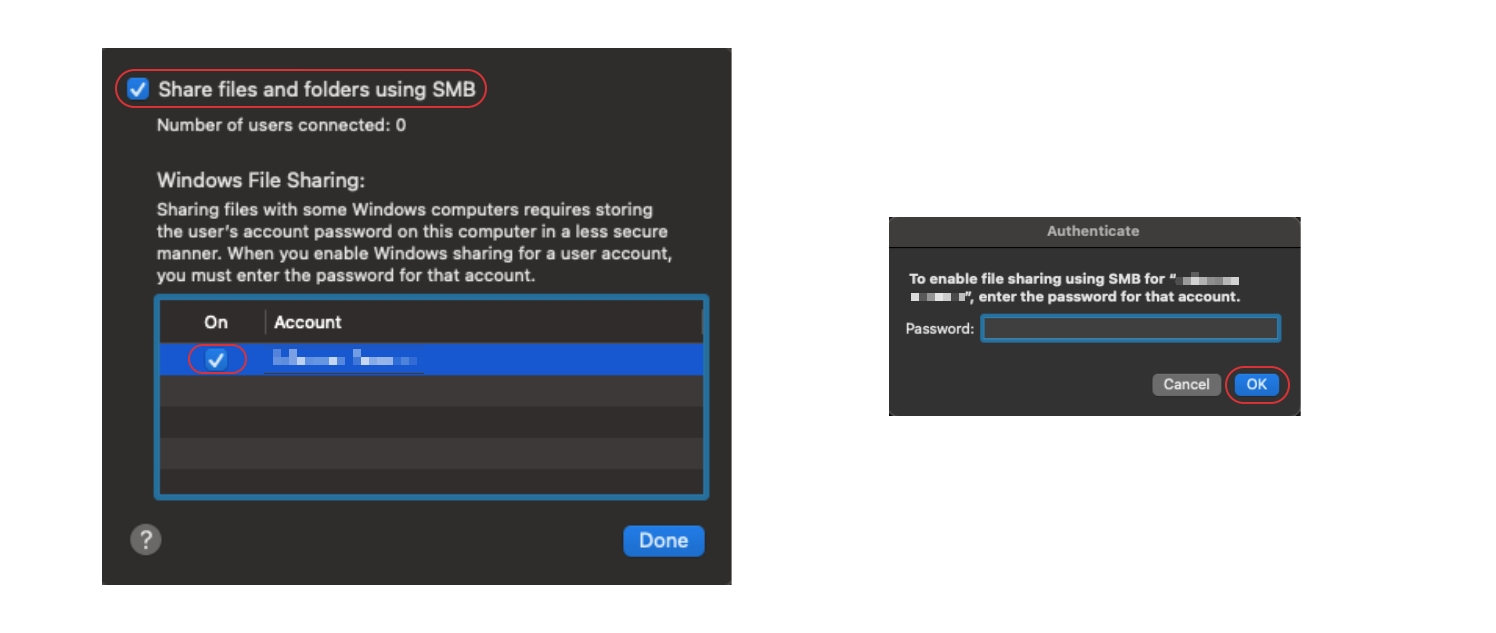
From that popup, make sure you select to allow “Share files and folders using SMB” and select your user account. You will be prompted to enter your credentials for this macOS account. Enter your password, click OK, then click Done, which should take you back to the Sharing services screen.
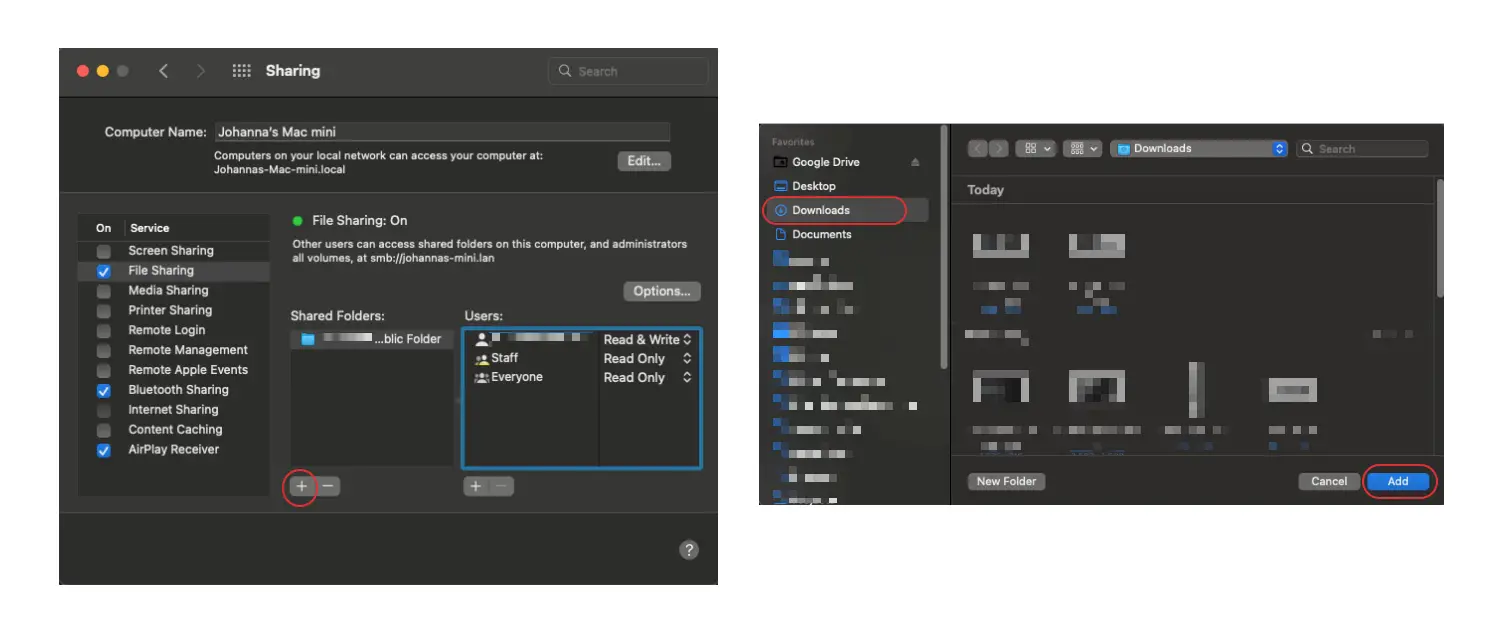
From here, under “Shared Folders”, add the folder on that Mac that you want to share. macOS already includes a Public Folder that you can use for this purpose, but if you wanted to share a specific folder such as where you keep your movies, you will need to add it here by clicking on the + then navigating to it.
Once the folder has been added, you will need to select what type of access you want to give your user account. If you want to be able to add files from your Chromebook back to this same folder, and not just view what’s in there, you will want to select “Read & Write” versus “Read Only”.
Note down the SMB path, which you can see right below the File Sharing status area. This is what you will need to type in on your Chromebook when we get to that section below.
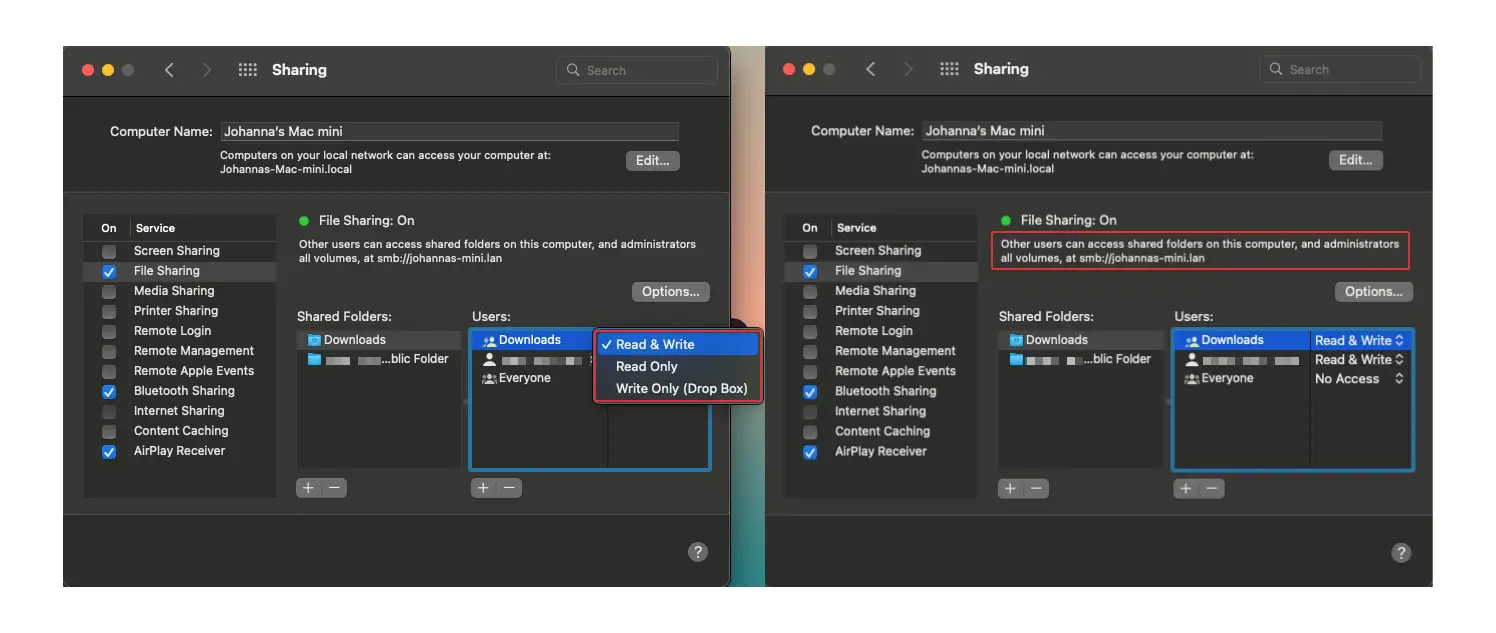
As you can see, I have my Downloads folder shared, as I use this to transfer files back and forth between my Mac Mini and my Chromebook. I find this easier and faster than sharing them via Google Drive.
I just want the steps!
1. Go to System Preferences, then click on Sharing
2. Select File Sharing, then click on Options
3. Allow “Share files and folders using SMB” and select your user account
4. Enter your password, click OK, then click Done
5. Add the folder you want to share under “Shared Folders” and select the type of access you want to give it.
6. Note down the SMB path
On PC
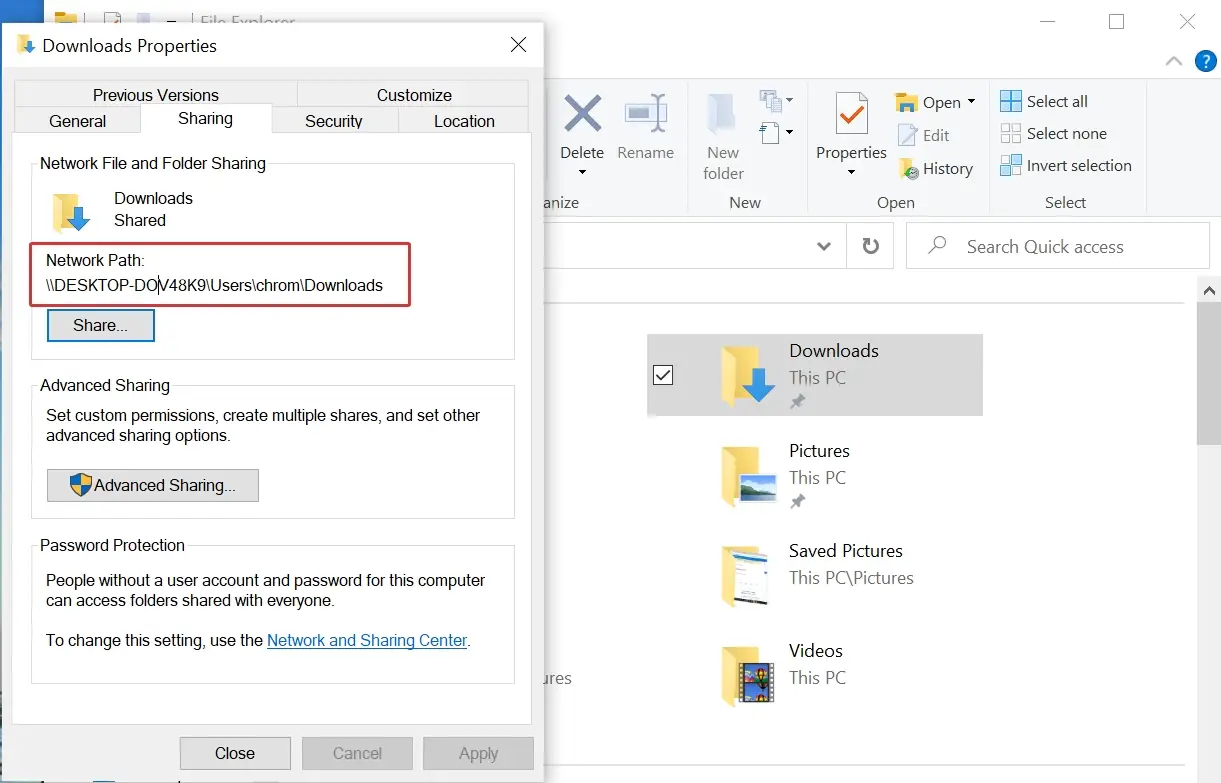
Open File Explorer and navigate to the folder you want to share. Right-click the folder and select Properties. From the Properties window, click on the Sharing tab, then click on Share. A Network access window will pop up prompting the account you want to share this folder with, type in your account name on that PC, and select the permission level.
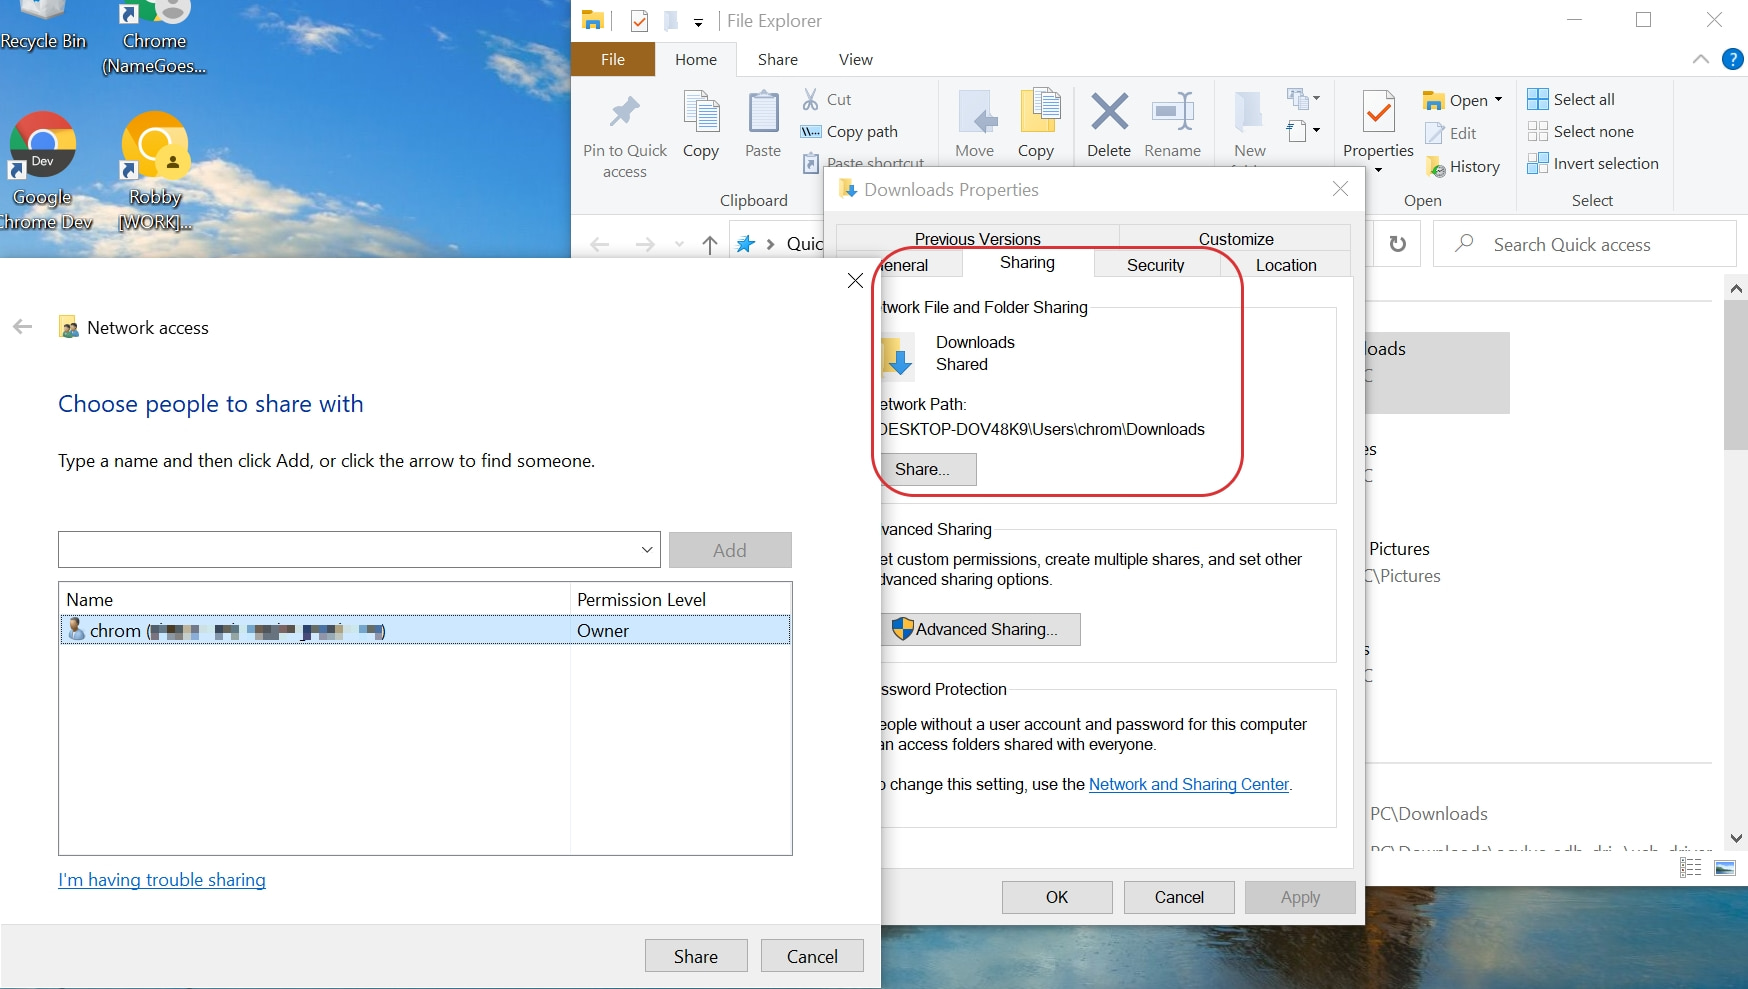
Next, you want to note down what the network path will be for this shared folder. You will need this for the next step.
I just want the steps!
1. Open File Explorer and navigate to the folder you want to share
2. Right-click the folder and select Properties
3. Click on the Sharing tab, then click on Share
4. Enter the account name you want to give access to and select the permission level
5. Note down the network path
Mapping a Network Share on a Chromebook
To map the folder you shared on your Chromebook, open the Files app, then click on the 3-dot menu on the top right. Select Services > SMB file share.

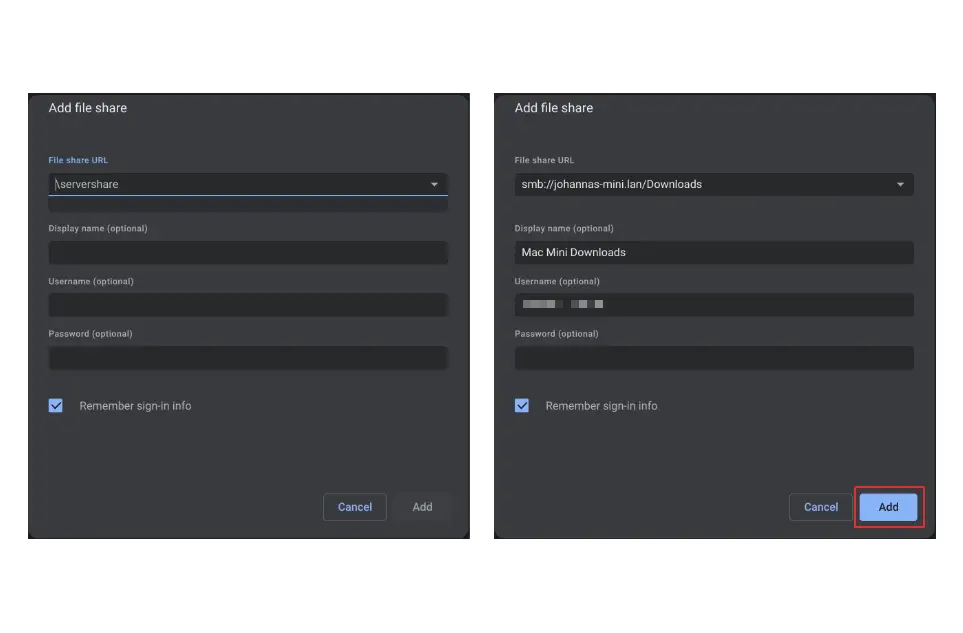
You will get a popup asking you to add the file share. Enter the File share path – which you got from the step above when you made sure your folder was shared – followed by your preferred display name, and the credentials you used when sharing the folder on your Mac or PC. Once you’ve filled all that in, click on Add.
Note: SMB file shares on mac are preceded by “smb://” and use the forward-slash “/” to show sub-folders. On Windows, it uses the back-slash “\” instead.

I just want the steps!
1. Open the Files app, then click on the 3-dot menu on the top right
2. Select Services > SMB file share
3. Enter the file share path, preferred display name, and credentials. Click on “Add“
Your shared folder should now appear in your Files app on the left where all your device folders are. You should now be able to interact with this folder contingent on the type of access you gave it in the first place and enjoy watching your stored media right on your Chromebook.
SUBSCRIBE TO UPSTREAM
Get Chrome Unboxed delivered straight to your inbox
Upstream is our flagship, curated newsletter with the top stories, most click-worthy deals, giveaways, and trending articles from Chrome Unboxed sent directly to your inbox a few times a week. Join 31,000+ subscribers.