

Support our independent tech coverage. Chrome Unboxed is written by real people, for real people—not search algorithms. Join Chrome Unboxed Plus for just $2 a month to get an ad-free experience, access to our private Discord, and more. Learn more about membership here.
START FREE TRIAL (MONTHLY)START FREE TRIAL (ANNUAL)
Google Photos is an incredible and transformative tool for the modern age, and millions have taken to it as their new photo and video storage and sharing solution. Although that’s the case, that’s not to say that it’s perfect or feature complete. There are still things that loads of people wish for, but luckily, Google has solved one of the biggest problems.
Anyone with kids will know the struggle of constantly sending pictures of their son or daughter back and forth to their significant other depending on who uses their phone to capture the moment. Instead of sending a photo through text or even though Google Photos of the cute smiles and goofy faces the kiddos make, you should be taking advantage of Google’s awesome ‘Partner Sharing’ feature.
Note: Partner Sharing will only work if you back up photos and allow Google Photos to detect faces via the settings.
What is Google Photos Partner Sharing?
This basically uses Google’s face match technology to identify any individuals face that you specify and automatically sends all photos with them in it to a recipient who is also of your choosing. In this case, choosing your child’s face match and pairing that with your significant other during the Partner Sharing setup will cause all images of your child or children to be sent to them automatically.
The best part is that anything sent to them automatically becomes a part of their photo library! That’s right, there’s no need to save the photos or send them to Photos – everything occurs automatically and right in the photo sharing app. With that in mind, let’s go ahead and learn how to set up Partner Sharing so you and your family can benefit from it!
How do I set it up?
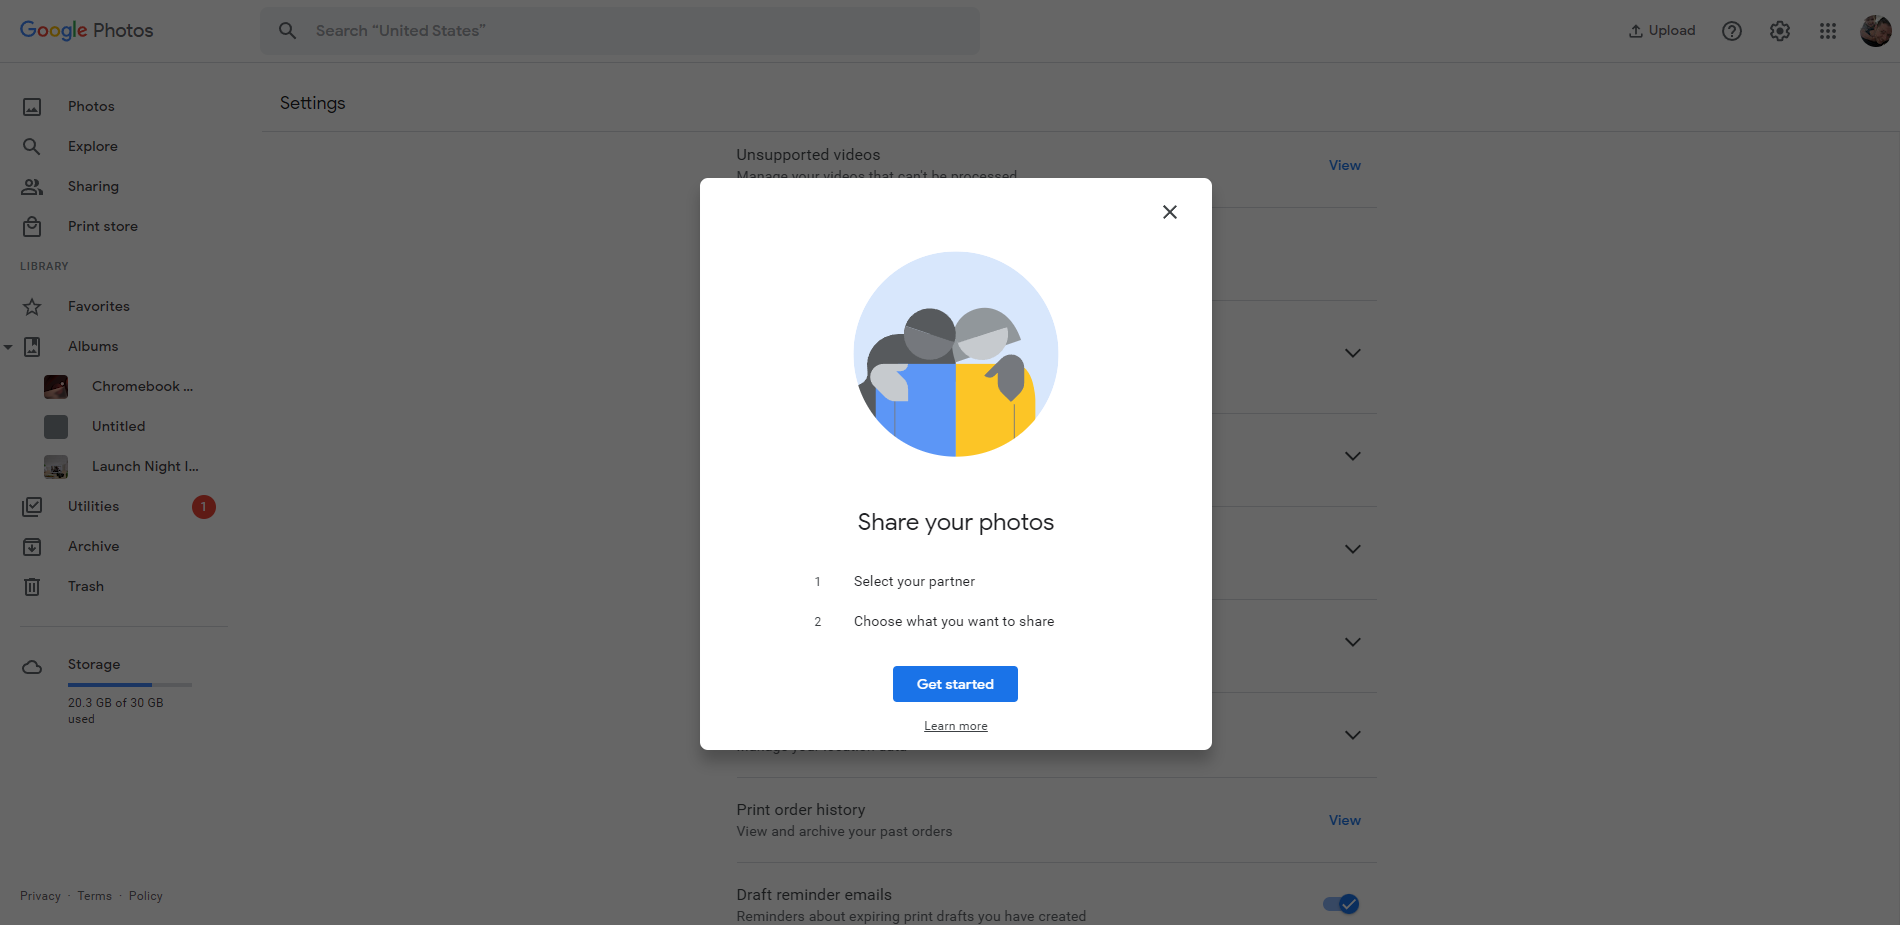
To get started, head over to Google Photos and click the cogwheel icon at the top right of the screen to see the settings. Once there, just click the ‘Partner Sharing’ section. You should see exactly what’s visible in the image below – an overview of the feature and its process as well as a blue “Get started button”. Go ahead and select that button to continue.
From here, the process is actually rather straightforward. All you’ll need to do is choose your partner by typing his or her name or email address into the “To” box. You can also select them from the list if they’re visible there, but if you don’t share anything with them often or manually, you may just need to type it out this time.
Click the blue “Next” button at the bottom right of this sharing dialog box and then head over to the “Choose settings” screen that’s displayed below. It will be the very next step in the process. Here, you just need to grant your partner access to either all of your photos (you brave, stupid or loyal soul…just kidding), or “Photos of specific people”. In the latter case, selecting it will take you to a screen that shows all of your face match results. Choose the face match result for your child or children and then continue by clicking “Done” at the top right of the screen.

You can share photos of specific people or share photos from a specific date onward. Photos will be shared automatically as they are backed up to your account.
Face group filtering is not available in all countries.
Google Photos Help
Lastly, there’s an option for sharing older photos, or photos you snapped before setting up Partner Sharing. If you’d like to retroactively share all photos and videos of your children or selected face match individuals from before Partner Sharing was set up, go ahead and change this from “off” to a specific date using the date selector that appears.
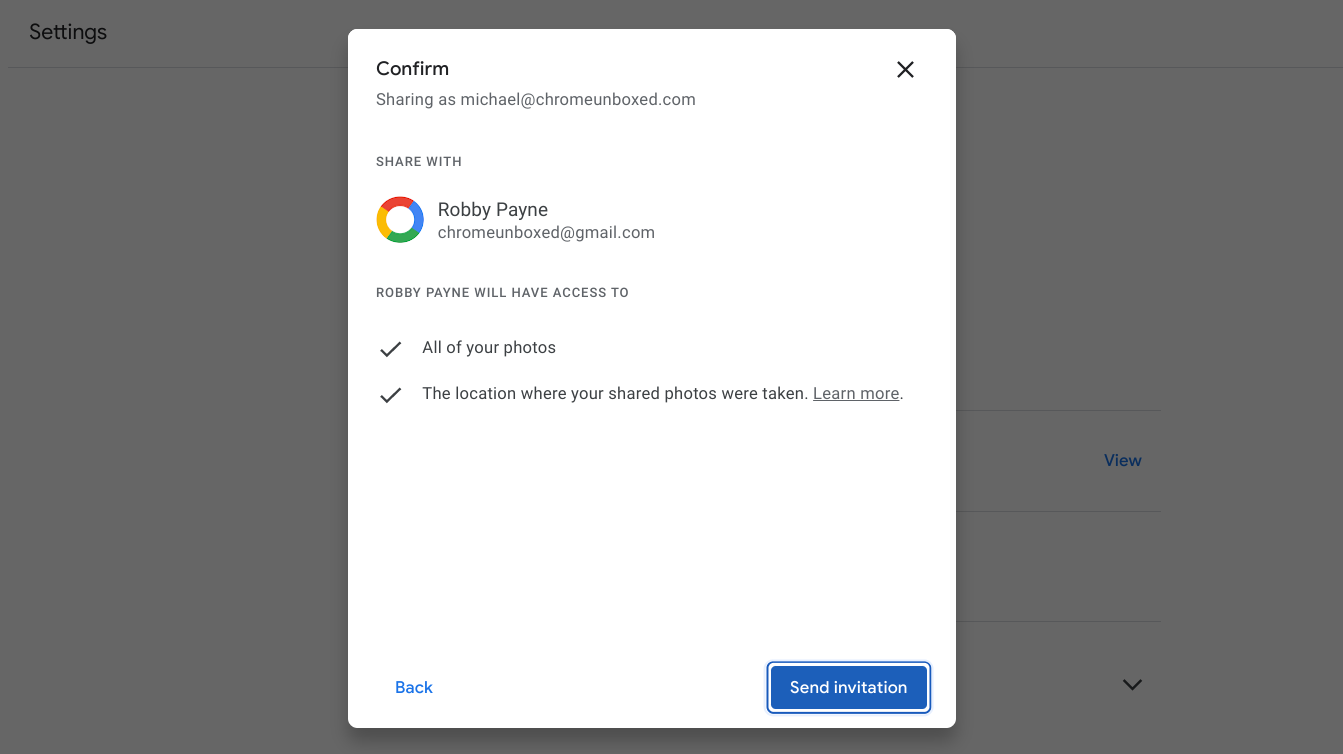
Once you’re comfortable with the settings you’ve chosen, just click the blue “Next” button at the bottom right of the dialog box. The last screen you’ll see is where you’ll “send invitation” to your Partner or the recipient of the photo sharing setup after reviewing the settings you chose on the previous screens. Google makes certain here to remind you what that individual will have access to.
Of course, you’ll want to have your sharing partner visit their email inbox to open and accept your invitation. Once they do, they should start seeing the selected photos appearing in their library tab. They will appear in the order in which they were taken, and not just all on top, so they may be mixed in with their own images.
I just want the steps!
1. Visit Google Photos
2. Click the settings icon at the top right
3. Click “Partner Sharing”
4. Click “Get started”
5. Type in your partner’s name or email address and select them and then continue
6. Choose to share all photos or photos of a specific person
7. If the latter, select the individual you will be sharing using the face match screen and click “Done” at the top right
8. Click “Next” and then review your settings
9. Click “Send invitation”
10. Have your partner accept the invitation via email
SUBSCRIBE TO UPSTREAM
Get Chrome Unboxed delivered straight to your inbox
Upstream is our flagship, curated newsletter with the top stories, most click-worthy deals, giveaways, and trending articles from Chrome Unboxed sent directly to your inbox a few times a week. Join 31,000+ subscribers.