


Support our independent tech coverage. Chrome Unboxed is written by real people, for real people—not search algorithms. Join Chrome Unboxed Plus for just $2 a month to get an ad-free experience, access to our private Discord, and more. Learn more about membership here.
START FREE TRIAL (MONTHLY)START FREE TRIAL (ANNUAL)
I presume since you’ve found your way to this article, chances are good that you’re Chromebook has fallen victim to an unexpected meltdown that’s left you facing the cringe-worthy message “Chrome OS is missing or damaged.” Perhaps you are a tinkerer like us and want to ensure you have a usable backup before you go exploring flags and channels on your Chromebook. If you’ve tried the other methods of resetting your device, creating a recovery disk should do the trick.
Whatever the reason, making a recovery disk for your Chrome OS device is quick and simple. In this video, we’ll walk you through the steps of preparing, downloading and installing a fresh recovery image on the Acer Chromebook 512. If you’re you prefer documentation, you can find the steps from start to finish below the video. Let’s begin.
If you are creating a recovery image simply as a backup, you can do so from that device. If your Chromebook is in need of recovery, you will need a second device to prepare the image. It can be a Chromebook, Mac or PC and you will need to have the Chrome browser installed if it is the latter two. You will also need a flash drive. I mention 4GB in the video but Google actually recommends 8GB now. Any flash drive SHOULD work but SanDisk is known to have issues when trying to use the Chrome OS recovery tool. So, you probably want to avoid that brand to be safe. You can find a variety at your local Best Buy.
Now, on to the process. On the device you’re using to create the recovery image, open Chrome and head to the Chrome Web Store. Search “Chromebook recovery utility” and scroll to the bottom where you’ll find “Apps.” It should be the first one on the list and will say “offered by Google.” (You can also click here to take the direct route.)

Install the recovery utility and launch the app. You will be prompted to have your flash drive handy. (it says 4GB but the support page says 8GB. Just get 8GB.) Click “Get Started” and we’ll move to the next step.
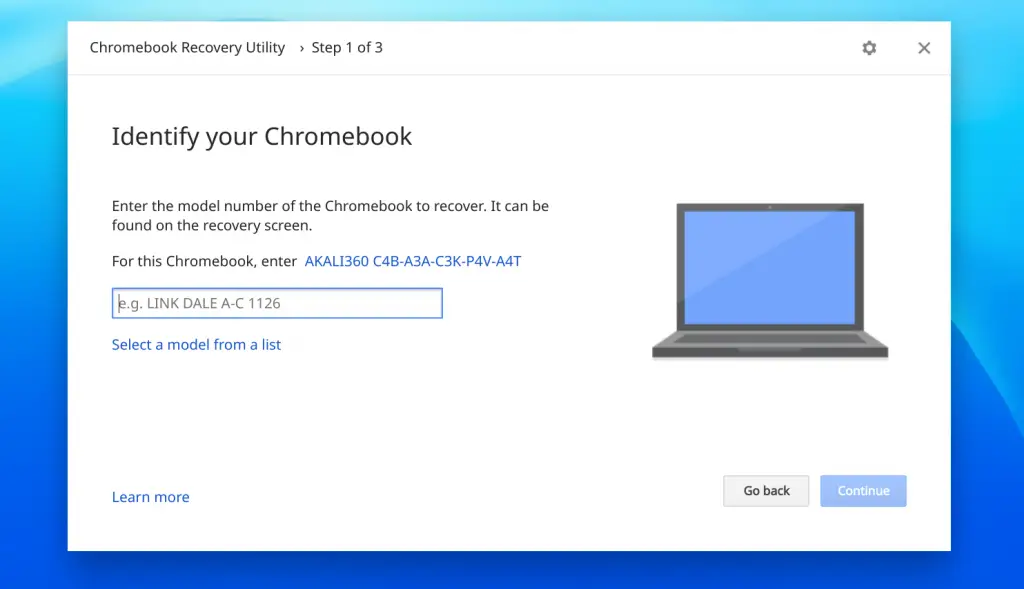
On this screen, you will select the device you are creating the media for regardless of the device you’re using to create it. The easiest way is to use the “select model from a list” and look for your devices brand and model. If it doesn’t show up, you made need to search by the Chromebook’s code name. You can find that list on the Chromium developer’s site, here.
Once you’ve found your device, make sure your flash drive is inserted and click continue. (This is a good time to note that you will want to make sure your Chromebook has a port that will work with the flash drive you purchased. If you only have USB-C ports and you bought a USB-A flash drive, you’ll need an adapter.) Next, you will select the flash drive from the drop-down list and click continue. You will be prompted with a warning that your flash drive is about to be wiped and reformatted. That’s ok, it’s why you bought it. Right?
The new recovery image will take a couple of minutes to download and another ten minutes or so write and verify (actual time will vary depending on device and internet connection). Once the process is finished, click done and don’t forget to eject your flash drive from the file manager just to be on the safe side.
If you’re creating a backup, you’re all done. Throw it in your bag or on your desk in the hopes you won’t have to use it. If your Chromebook is, in fact, borked, you will now power it on and insert the flash drive per the on-screen instructions. The installation process will begin automatically. When it’s done, you’ll be prompted to remove the flash drive from your Chromebook will restart and boot up to a fresh, clean install of Chrome OS.
I hope this walkthrough was a big help. We look forward to bringing you a lot more “help and how-to” content in the future. If there’s something specific you’d like to see us make a video about, drop a comment below and we’ll add it to the list.