


Support our independent tech coverage. Chrome Unboxed is written by real people, for real people—not search algorithms. Join Chrome Unboxed Plus for just $2 a month to get an ad-free experience, access to our private Discord, and more. Learn more about membership here.
START FREE TRIAL (MONTHLY)START FREE TRIAL (ANNUAL)
A Hanging indent, also known as a second line indent or reverse indent, is a style of paragraph indentation that has the first line flush with the left margin but indents all of the lines under it in a paragraph. It is commonly used in MLA, APA, and other citation styles and helps the reader easily scan a “works cited” or “bibliography” page for breaks and/or author names.
How do you create a hanging indent in Google Docs?
To apply a hanging indent in Google Docs, put your cursor in front of the line/paragraph you want to indent, then click on “Format” on the Docs menu. Next, click on “Align & Indent,” followed by the “Indentation options” sub-menu.

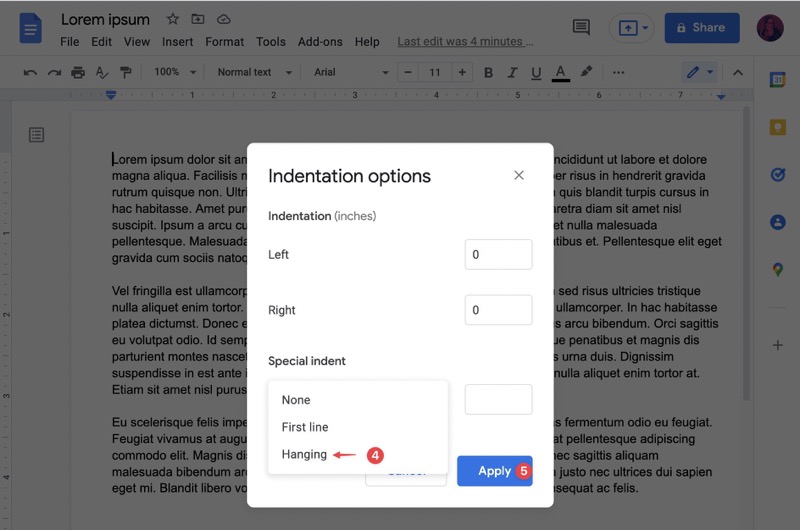
A popup will come up with indentation options. Under “Special indent,” click on the drop-down and select “Hanging.” Finally, click on the blue “Apply” button to apply your changes.
I just want the steps!
- Put your cursor in the line/paragraph you want to indent.
- Go to Format > Align & Indent > Indentation options.
- Under “Special,” select “Hanging.”
- Click on the blue “Apply” button.
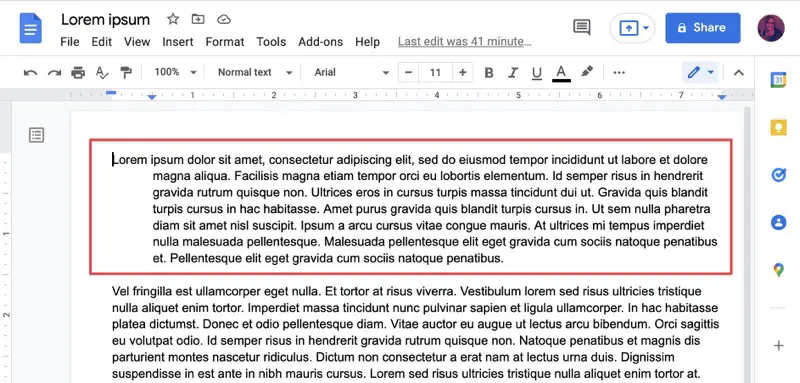
That’s it! Your selected paragraph now has a hanging indent, as shown in the image above. If you want to add a hanging indent on more than one paragraph, simply select all the paragraphs for which you want to add this style and repeat the same steps. Happy citing!
SUBSCRIBE TO UPSTREAM
Get Chrome Unboxed delivered straight to your inbox
Upstream is our flagship, curated newsletter with the top stories, most click-worthy deals, giveaways, and trending articles from Chrome Unboxed sent directly to your inbox a few times a week. Join 31,000+ subscribers.