


Support our independent tech coverage. Chrome Unboxed is written by real people, for real people—not search algorithms. Join Chrome Unboxed Plus for just $2 a month to get an ad-free experience, access to our private Discord, and more. Learn more about membership here.
START FREE TRIAL (MONTHLY)START FREE TRIAL (ANNUAL)
This is a really fun trick that, when done right, can give you a very interesting, very cool new tab page each time you open up your Chrome browser. For quite some time now, users have had the ability to add customization to Chrome to change the color of the main elements and add custom images to the backdrop of the home screen you land on when you first open up a new tab. That’s not new. What is new is the fact that you can actually set that background image to be an animated one with this handy little trick shared by The Verge.
First up, the execution of this little tip relies on a bit of tech that I don’t fully understand at this point. Everyone is familiar with GIFs as animated pictures we use to convey all sorts of meanings and emotions. Apparently, you can change the .gif extension to .png and the GIF will still continue to animate properly. While I understand that there is an animated PNG, I’m unsure if changing the file’s extension makes it a different form of file or if animated PNGs and GIFs are actually quite similar. Honestly, for the sake of this tip, it doesn’t matter. It’s just interesting.
How to set a GIF as your Chrome background
Let’s get into how this works. First, you need to identify you source material. Get a GIF or make a GIF that you would like to look at every time your new tab page is opened. You’ll see this likely more than you realize, so choose wisely. Once you’ve either found and downloaded or created this GIF, you’ll need to change the extension on the file’s name. It should look something like yourFile.gif and you need to use your file manager on Chrome OS, Mac OS, Windows or Linux to change that file extension to something like yourFile.png. For Chromebooks, a simple right-click on the file, select the rename option, and then swap out the extension. You can also just click on the file, hit CTRL + Enter and you’ll get there a bit quicker.
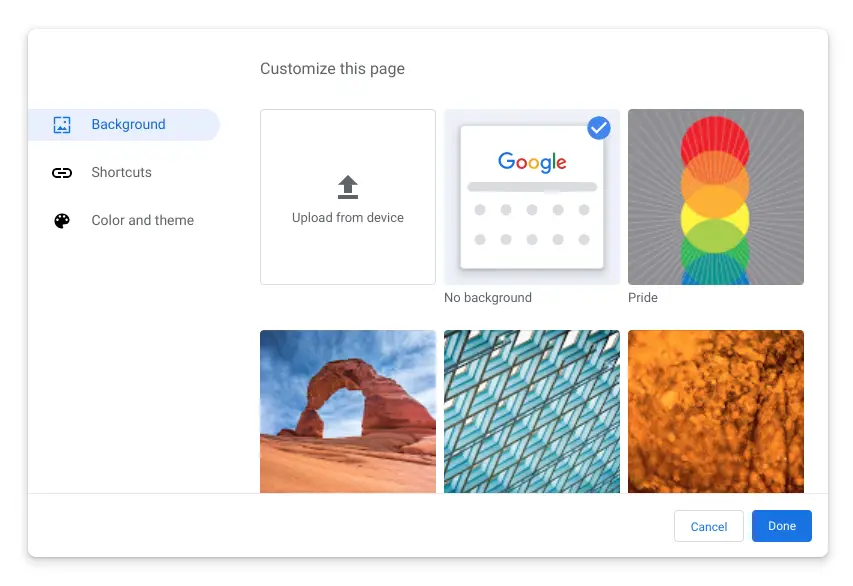
Once that is done, you can now open up a new tab page and look in the bottom-right corner for the edit button. Hit that button and you’ll have a list of options presented to you for color themes and backgrounds. You will want to choose the option to upload from your device. Click that big upload tile and choose your recently-renamed animated PNG file and you’ll immediately see your custom animation as your new tab page background. Easy, right?
Obviously, Google meant for these backgrounds to be still images and that is why the background selector doesn’t account for your GIFs in their initial format. Since changing the file extension doesn’t seem to break the animation, this little change simply allows the background selector to see the file and allows the user to set it.
When I first saw this, I was a bit amused. Having actually put it into practice, however, I really like the results! I’m now on the hunt for more creative backdrops for my new tab pages as we speak. If you’ve never customized your Chrome browser, maybe this is the thing that gets you on board. I’m looking for a good aquarium, cloud, and beach GIFs right now.
Shop Best Chromebooks of 2020 So Far on Chrome Shop
SUBSCRIBE TO UPSTREAM
Get Chrome Unboxed delivered straight to your inbox
Upstream is our flagship, curated newsletter with the top stories, most click-worthy deals, giveaways, and trending articles from Chrome Unboxed sent directly to your inbox a few times a week. Join 31,000+ subscribers.