Up next in 10

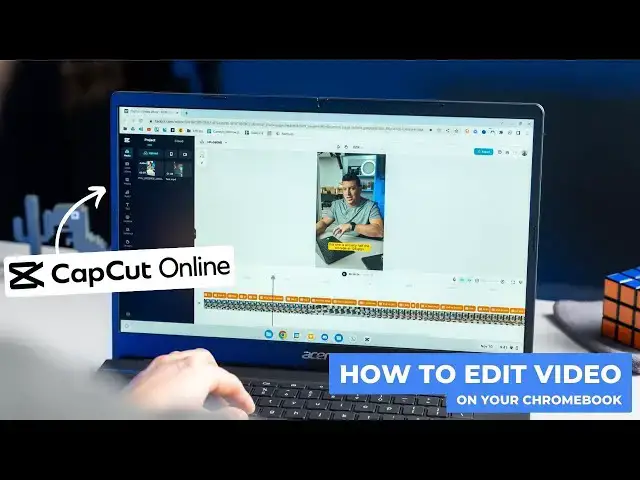
How To Easily Edit Video On Your Chromebook With CapCut Online
Jun 5, 2024

Sponsored by Capcut Online Video Editor. A free video editor designed for the web. Click here to try CapCut Online: https://shorturl.at/cdqFI
You can also install CapCut through the Google Play Store
#capcut #capcutonline #chromebook #onlinevideoeditor #videoeditingtutorial
・・・・・・・
We get asked a lot about editing video on Chromebooks. Can it be done? What's the best tool? What are the limitations? Should I even bother? And up until recently, I met most of those questions with negative answers, basically instructing people to find another tool that better suits them if video editing is of the top priority. But that is all beginning to change thanks to great online tools like the CapCut Online Video Editor!
READ MORE 👉 https://chromeunboxed.com/how-to-edit-video-like-a-pro-with-capcut-online-video/
Join our newsletter: http://bit.ly/2WjCDm7
・・・・・・・
Fueled by Fresh Roasted Coffee! Buy the special edition Chrome Unboxed bag here: https://chromeunboxed.com/coffee
Shop Chromebooks on CHROME SHOP: https://chrmshop.com/
Show More Show Less View Video Transcript
0:00
One of the things we get asked about Chromebooks most is
0:02
can I edit video on this thing? And for a long time, I would say, eh, not really
0:08
But thanks to new tools that have come on the web, like CapCut's online video editor
0:13
that answer is changing pretty quickly. And so today we want to actually sit down
0:18
and build out an entire video for you in CapCut's online video editor
0:23
so you can see how powerful editing video on a Chromebook has become
0:27
So for someone like me who just needs to hop in and make a quick video here and there
0:37
I don't want a tool that's overbearing or really difficult to learn
0:40
I don't want to spend hours having to learn all the little ins and outs of a piece of software
0:45
I just need something that works. But I also needed to have enough power to accomplish the things I needed to do
0:51
And then I needed to do that very quickly and seamlessly and efficiently. So I think I'm asking a lot of online video editors
0:58
And honestly, in the past, none of them have really worked out for me and I've just kind of given up on trying to use them
1:03
until I tried the CapCut online video editor. And I remember the first time I picked it up and used it
1:08
I was blown away. I made a couple videos pretty quickly and I really enjoyed using it quite a bit
1:15
And after doing so, CapCut actually approached us and said, hey, look, we'd like you to make a video
1:21
We'd like to sponsor a video. And we thought this would be a good chance for us to not only partake in that sponsorship
1:26
but also to show you all how easy it is to make videos
1:30
like good quality videos on your Chromebook using their online editor. For today, instead of having me walk you through that
1:37
and kind of dumb down the entire process, because I'm just not into all this stuff
1:42
I like good videos, just don't really get into making good videos
1:46
And so I thought it would more appropriate to actually have Joe walk you through this
1:50
And Joe's used to making really complex videos. The stuff we make normally here
1:54
massive files with raw video. And it takes a lot of computing power to do that
2:00
And we're not trying to say that you're gonna make like movies with CapCut's online video editor
2:05
but for stuff like shorts or TikTok or reels, that kind of stuff, short form video can be done 100% now
2:12
on your Chromebook with a PWA, something that is delivered to you on the web
2:16
And that just brings together all the stuff that we want to see for video editing on a Chromebook
2:21
I love this tool. And so I'm excited for Joe to kind of walk you through this process and for a lot of you out there
2:26
to finally try this tool that we've talked about a little bit in the past
2:30
but to finally see it in motion and to see the finished product at the end of the video
2:34
Hey, what's up everyone? Joe here. So like Robbie said, let's dive into editing a video on your Chromebook
2:41
with the CapCut online video editor. This is a tool that we've been using a lot
2:45
for editing social media clips, things of that nature. But I think this is a great tool for a lot of folks
2:50
I think students who are getting into video editing, want to learn how to edit a video
2:55
they can do this on their Chromebooks now at school. So great tool for students
2:59
Anybody who is a creator making short form content, this is a great tool
3:05
You can do it on the web and create your short form content
3:09
for shorts or for reels or for whatever. And I think that any brands out there
3:14
who are making content for ads or just to post on social channels
3:18
this is a great tool that you can easily create content. So let's hop right into editing a video
3:26
on the CapCut online video editor on a Chromebook. So head over to capcut.com
3:32
Let me jump out to the main page here. And once you load this up
3:37
this is just the generic landing page. If you come up here to tools, you can click on online video editor
3:42
and get a landing page for the online video editor here. But the great thing is that this is online
3:49
This is running here in the browser. They do have a PWA. If you come up here into your toolbar
3:55
you can see it says install CapCut web. And if we click that
4:00
I can actually install a PWA of the CapCut online video editor
4:05
You can drag that down there on your shelf if you want to pin that
4:09
And one other way to install CapCut is through the Play Store on your Chromebook
4:13
So let's uninstall this one. This was the PWA that we installed through the browser
4:19
Uninstall, great. And let's head over to the Play Store, search for CapCut
4:26
And there it is. So click install. And once it's installed, open
4:32
And there we have it. This is still the PWA, but delivered through the Play Store
4:37
But if we want to do all of this on the web
4:41
let's head over to capcut.com and sign in. And once you're in
4:46
this is kind of the main dashboard for the CapCut online video editor
4:51
where you can get started on a project. This actually isn't the main editor
4:55
So in this one, you can go into create a new project up here
4:58
in the top left. Gives you a few different templates here if you want to start a 16 by nine video
5:04
nine by 16, a vertical video. Or if you want to create an image
5:08
they've got some image tools built in here as well. You can also hop into your recent drafts
5:13
check out your share history. If you've shared out a project with someone
5:16
Templates, magic tools. And then they do have spaces. You can collaborate with team members
5:21
or fellow students with the spaces tool here on CapCut. They also have some great video templates here
5:30
So if you want to make a Black Friday promo here, for example, you can do that
5:36
Click right in here, use this template and drop in your own footage
5:40
and get rocking and rolling. But if we'll click back over to the main dashboard here
5:45
let's say I want to hop right in to make a new project
5:49
So let's go to new nine by 16, cause we're going to do a vertical video
5:53
I already plugged up my pixel eight and dragged the footage that we just shot
5:59
onto this Chromebook into the downloads folder there. So you can see the clip that we're going to be using
6:05
And if we want to upload that one, we'll come over here to project
6:09
upload, upload from computer and upload that clip. And while that's uploading a couple other quick things here
6:17
in this actual editor dashboard here, you've got your cloud storage in the top here as well
6:22
This is where if you had a workspace set up with your team
6:26
you could access those shared files. Within the project, these are just the files that you've uploaded
6:31
into this project. They also have a kind of cool upload from your phone here
6:36
with a QR code, or you can actually record content right here
6:39
from your Chromebook or from your device using CapCut. They also have some stock video, stock photos
6:48
audio, sound beds. You can use all of your text templates here
6:53
captions, which we'll get into here in a minute, transcript, base editing here, which is pretty wild
7:00
We haven't used that a ton, but you can literally go in, delete text and it will edit the video for you
7:05
They've got stickers here, effects, so some video effects, some edge glow, some shake
7:10
different things like that, transitions to go in between your clips and some basic filters
7:16
But let's hop back over into the media and see if our clip has uploaded
7:22
It has. So let's grab that and drag it right down here
7:26
into the timeline. You can also just double click it and it drops it straight into the timeline there
7:32
And now that we're in the actual editor, you can see how straightforward and easy to use this is
7:39
You've got a basic move tool, a hand tool, zoom and a undo and restore back and forth here
7:49
Your export stuff is up here in the top right. We'll get to that in a minute
7:52
But down in your timeline, you can kind of browse through the clip in your timeline
8:00
by just skimming here, or you can click on your timeline and go throughout the video there
8:06
And if you get to a spot in the video where you want to trim, you've got your split tool right here
8:12
You can zoom in and out on the Chromebook. It's gonna be control plus or minus
8:18
So let's zoom in a little bit here so we can actually trim up this video just a little bit
8:23
Also in the editor here, if you click on your clip down on the timeline
8:29
you'll see you get some extra features over here on the right side
8:33
Under basic, it's pretty wild here, the tools that they've built into an online video editor
8:39
You can actually do some pretty robust color adjustments here on your video right here on the web
8:46
with some basic saturation, temperature, hue stuff. Over here on the HSL tab
8:51
you can get some hue and saturation lightness options for some different colors
8:57
They give you full RGB curves here. Pretty incredible for an online video editor
9:02
You can do masking. You can do some blending here. But the main thing is transform here
9:08
So if you need to scale up or rotate your video, you can actually do that right here under the transform
9:15
They also have a stabilization built in. Over here on the background tab
9:19
you can adjust your backgrounds. They've got some smart tools like removing background
9:24
that are built right in as well. Your audio settings are here
9:28
Animations of the clips in and out, you can adjust right there
9:33
And then you get your speed settings. So for this clip, let's see how the intro is
9:39
We're probably gonna need to trim off just a little bit. So you hear me saying rolling here
9:47
Turn that up a little bit so you all can hear that. So we'll find right there where Robbie comes in
9:53
right there. And we'll click the split tool. Select that first piece that we don't need
10:00
Get rid of that. And at the end here, boom, grab that
10:06
I'm just doing space bar to start and stop. Split that, grab that one, delete it
10:14
And now, easy as that. There it is. Easy as that. We've got a video that we trimmed up
10:23
Obviously, you can get into a lot more editing with this. But for this example
10:27
I just wanted to show you a couple of quick things you can do there with these tools here
10:31
You can really get into adjusting and refining your clips. But for today, I just wanted to show you
10:38
a few of these basics. Also, as you click into the clip
10:42
you do get a few other options up here. You can actually reverse a clip
10:46
You can crop it right here. They do a mirror option and a few others here
10:53
But for right now, we've got this clip that I think is pretty much ready to go
10:59
The color balance is a little off on this right here at the beginning. And I wonder if the whole clip is like that
11:04
Yeah, I locked the white balance on this. So let's go in here, go to our color adjustment
11:13
Let's make sure we're selected on the clip. Let's go temperature down
11:18
You can see that adjustment as I'm going way up, making it super warm or very blue
11:24
We're gonna take it down just a smidge. Let's just go negative five on temperature there
11:28
So this is the HP X360. Great, I love that. After the fact that
11:32
All right, audio sounds pretty good. Let's click in here and just maybe boost it
11:38
just a little bit. Let's just maybe go up two decibels or so
11:46
So this is the HP X360 14C Chromebook, not Chromebook Plus that we just reviewed
11:52
Yeah, that sounds great. So there we have it. We've trimmed it. We've adjusted the white balance
11:57
and we've adjusted our audio right here on a Chromebook in the browser
12:04
And again, there's all sorts of tools in here. I've played around a little bit
12:08
with the removing background. It seems to work just fine. And there's all sorts of tools in here
12:14
You can do all sorts of transitions and filters. But for today's example
12:20
that's how we're gonna leave this clip. And actually for us, we try to keep our social media videos
12:26
pretty straightforward. But let's get into some captions. So I'll go up here on the top left in my preview area
12:33
and click the TikTok preview. So I can actually see where my buttons
12:37
are gonna hit on the video after we upload it. And I can use that to adjust the size of my captions
12:45
And one of the awesome tools that is built in to the CapCut Online Video Editor is auto captions
12:52
So if you go over there on the left side and click captions and then click auto captions
12:58
it's gonna ask you if you want to generate them in English or whatever language you prefer for your content
13:04
We're gonna go English and click generate. And as it loads in here, you can see it took all of the spoken audio in this video
13:09
and made captions for us. This is a huge time saver for anybody who's ever done captions manually
13:18
It is not a fun process. And this is just a huge, huge time saver
13:24
and an easy way to create captions for your content. So I'll actually go through and clean these up
13:32
here in a minute before we export this and upload it. But you can tell it has taken all of the audio
13:38
broken it up over here on the left side and made auto captions for this video for us
13:43
You can see the captions are a little lower on the video than what we want
13:47
And it actually got the, whenever I said rolling right there at the beginning
13:52
So we're actually just gonna, we're gonna zoom in a little bit on that and we're gonna grab that caption and delete it
13:58
And there we have Robbie getting started. This caption is sitting a little too low
14:03
So we're gonna pull it up. I really like these colored background captions
14:08
I think they pop nicely. Let's roll with that. I'm actually gonna squeeze this in just a little bit
14:15
make it a little smaller. And you can see here as I make that change on my preset
14:20
it's gonna apply that to all of my clips. And if we wanna go in here and change maybe
14:25
the background color on our caption, we can click into basic and change that background color right there
14:32
You can change the font, the size, you can make it bold. You get all of your regular text options here
14:39
They also have some, if you wanna refine your position or scale here
14:44
you can also do that. Maybe even do a rotation on one of them
14:48
So you can really fine tune your captions here and get them exactly the way that you want
14:53
So one other option that you might've noticed over here on the right side is text to speech
14:57
So if you had a video clip and had some text on it
15:01
and you want that text to be read aloud, you can actually do that
15:05
So let's grab a random stock video. I'll just double click that, throw it at the end
15:11
And there's our kitten. We'll throw some text over it and I'll click on text
15:16
Let's go add heading. And we'll just have this say, Chrome OS is the best
15:26
And you can, as I'm doing this, you can also see some of these very awesome text features
15:31
that they have just built right in here. And so now we've got our text on the screen here
15:36
and let's just go over to text to speech and let's go with Jesse
15:40
one of probably the more common voices you've heard. If you've watched TikTok
15:45
Chrome OS is the best. Chrome OS is. Chrome OS is the best
15:50
So she needs a little adjustment there. Let's go with Chromebooks are the best
15:56
We'll actually go down here and delete that audio and then we'll go back and let's throw Jesse back on there
16:03
Chromebooks are the best. Perfect. So if you want to add some spoken word
16:09
to your video that doesn't have any, you can do that pretty easily with that text to speech feature
16:14
Okay, so let's delete that and get back to editing our video
16:19
So like I said, I would go through and clean up these captions
16:23
I'll do that here in a moment before we actually export this and get it uploaded
16:27
23, this one's probably. It's pretty close though. I mean, you can see these aren't too far off
16:33
Something there, X360 14. See it got a little off on that
16:38
but I can go through and clean all of this up and get this video ready to export
16:42
And when I am ready to export, I'll go up here. It's asking me to leave the floating panel open
16:49
Yeah, sure. So we'll go up here to export and it's gonna ask us where we want to export this
16:54
You can share it directly to TikTok, ads manager, YouTube, YouTube shorts, all of these
16:59
I just want to download it. So I'm going to click on the download at the bottom
17:04
We're gonna call this HPX360 non-branded. Get rid of this file name here at the beginning
17:13
And then you can see we've got a few options for our resolution. Let's go 1080 on this one
17:18
It's gonna give us some export quality settings here. Let's go with our highest quality
17:23
and 30 frames per second as our frame rate there. As we click export
17:28
it's going to take all of that that we've edited, all of our captions, export it
17:33
and we'll have a video ready to upload. And while that's working
17:37
there's one other quick thing I wanted to show you. They also have a ChatGPT plugin
17:43
So you can actually generate video from ChatGPT by just prompting with text
17:51
So let's hop over and I'll just show you some of that real quick
17:54
So once you're in ChatGPT, you'll head over to ChatGPT 4 and install the CapCut plugin
18:02
Make sure that you have plugins turned on and go into the plugin store and install the CapCut plugin
18:07
And now you can ask and prompt ChatGPT to create video content for you
18:13
And if you have ad copy or if you have a script and you want ChatGPT to create video for you
18:20
it will do that. So let's go over here and ask, can you create a video for me
18:24
comparing Chromebooks and MacBooks? And let's see what it generates for us
18:30
Okay, your video comparing Chromebooks and MacBooks has been created. Let's click the view video and see what ChatGPT created
18:38
for us with just that very simple prompt. And obviously you can create much more elaborate prompts
18:44
and be much more specific with the video that you want ChatGPT and CapCut to create for you
18:50
But let's see what they got here for us. Between Chromebooks and MacBooks
18:55
it's a hot topic. Chromebooks, known for their affordability and cloud-based. Okay, so script appears to be pretty good
19:04
Stock photos are not great. You can tell over here it's importing all of those
19:09
into this project. It's also going to import those into your cloud account
19:13
just FYI, that will take up storage in your cloud account. They give you a certain amount for free
19:19
and then you can buy more storage. But if you notice that you're running low on storage
19:23
that could be why. If you use a template or you create video with ChatGPT
19:29
it's going to count towards your storage. So let's go back in here and just see what we got
19:34
Yeah, so it created a soundbed for us. It has a soundbed on the video
19:41
It has text with text-to-speech created already and some stock photos. These stock photos are not great, as you could tell
19:50
You would probably need to go in here and make some adjustments to those
19:54
But the script appears to be okay. You could use this as a starting point
19:58
if you're working on a project. So yeah, this is something that is fairly new from CapCut
20:04
and I just wanted to show that to you there. This could be a great starting point for a project
20:08
You could just have ChatGPT create your text and your text-to-speech for you
20:15
So you don't have to do that. But yeah, this is something kind of new
20:20
You could use this as a starting point. You could go in here and adjust this. But let's hop back over to our project
20:25
and see if it's done exporting and it appears to be. Okay, let's click Download on that
20:33
I can already tell there that this export, I'd actually done one of their export a minute ago
20:38
You can see here, this export is 88.9 megabytes compared to the 153 megabytes of the original file
20:45
So it's actually a little smaller. So let's hop in and watch our video that we just edited on a Chromebook
20:54
We made some color adjustments, we adjusted audio, we added captions, trimmed this video up
21:02
all on a Chromebook. And this is just a very simple example
21:09
I'm actually gonna go in and make some tweaks to those captions and get this video exported and uploaded
21:15
So you could go into CapCut and do a lot more. This is just a very straightforward example
21:21
But for our social media stuff, this is kind of the format that we roll with
21:25
And that's kind of what I do anytime I edit our short-form content
21:31
It's pretty straightforward and CapCut is the perfect tool for that. So if you're interested in getting started
21:36
and editing video on your Chromebook, there's a link down in the description
21:40
or you can just head over to capcut.com and click on that online video editor
21:45
But that's it for this one. If you all liked this video, make sure to give us a thumbs up
21:49
go down there and click subscribe, and make sure to ring the notification bell
21:53
if you wanna get an alert whenever we make future videos, kinda like this one, or Chromebook reviews
21:58
or Chromebook unboxings in the future. But that's it for this one. We will catch you all in the next video
22:03
See ya. ♪ Hey hey hey hey hey hey hey hey hey hey hey hey hey hey hey hey hey hey hey hey hey hey hey hey hey hey hey hey hey hey hey hey hey hey hey hey hey hey hey hey hey hey hey hey hey hey hey hey hey hey hey hey hey hey hey hey hey hey hey hey hey hey hey hey hey hey hey hey hey hey hey hey hey hey hey hey hey hey hey hey hey hey hey hey hey hey hey hey hey hey hey hey hey hey hey hey hey hey hey hey hey hey hey hey hey hey hey hey hey hey hey hey hey hey hey hey hey hey hey hey hey hey hey hey hey hey hey hey hey hey hey hey hey hey hey hey hey hey hey hey hey hey hey hey hey hey hey hey hey hey hey hey hey hey hey hey hey hey hey hey hey hey hey hey hey hey hey hey hey hey hey hey hey hey hey hey hey hey hey hey hey hey hey hey hey hey hey hey hey hey hey hey hey hey hey hey hey hey hey hey hey hey hey hey hey hey hey hey hey hey hey hey hey hey
#Consumer Electronics
#Multimedia Software
#Video Sharing