Up next in 10


Sponsored by NordVPN. Try it out and get 75% off a three-year plan for a limited time! Click here: https://chromeunboxed.com/nordvpn
Shop Chromebooks on Amazon: https://fave.co/2OuedYL
Get CloudReady: http://neverware.com/freedownload
Get Chrome Recovery Utility: https://goo.gl/LUNVIU
CloudReady Supported Devices: https://goo.gl/1i9IHr
・・・・・・・
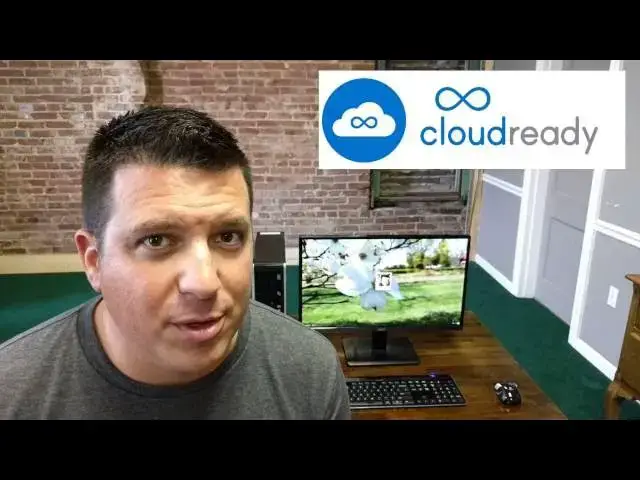
In this video, we take a look at Neverware's CloudReady software, a custom build of Chromium OS that feels and behaves very, very similar to the Chrome OS we see on officially licensed devices.
Neverware's approach is unique in that they have a huge list of devices that are supported, the service is free for individual users, and the entire OS can run quite well from a USB drive.
Check out the video for a how-to and a quick look at CloudReady in action! And go to http://chromeunboxed.com for more Chrome OS news!
Read more: https://chromeunboxed.com/
Join our newsletter: http://bit.ly/2WjCDm7
Show More Show Less View Video Transcript
0:01
hey folks Robbie pay with chrome unbox
0:03
coming at you today with a quick guide
0:05
on how to install Chrome or rather a
0:07
specific version of chromium built by
0:09
neverware on your aging PC laptop
0:13
notbook or MacBook device we'll talk
0:16
briefly about what cloud ready is who
0:18
neverware is and what their aim is with
0:20
this software and then we'll give you a
0:21
pretty brief how- to and get you go in
0:24
on your device of
0:28
choice
0:32
so what is cloud ready it's actually a
0:35
specific build of chromium OS and
0:37
chromium OS is the open source version
0:39
of Chrome OS that anybody can use for
0:41
whatever they want to use it for it is a
0:43
specific build of chromium OS by
0:46
neverware designed for school systems
0:49
that need some admin functionality and
0:52
need to replace aging old outdated and
0:55
slow PCS Andor Macs and so the idea here
0:58
is you can deploy cloud ready onto a ton
1:02
of machines have some admin capability
1:05
from an IT standpoint and just pay a
1:07
license fee for this software uh to
1:09
neverware each and every year and
1:12
quickly turn your uh almost extinct line
1:16
of devices into something that actually
1:18
works is nice and fast and we're going
1:20
to talk about how that kind of works uh
1:22
but I wanted to give you all some ideas
1:24
to what they do um and and as part of
1:26
this initiative they actually offer it
1:28
for free to people who to use it on a
1:30
single use case basis now you won't get
1:32
any of the Google admin console stuff
1:34
going on here because it's not really
1:36
meant for that and honestly if you're
1:38
using in your house you don't need that
1:39
anyway and so this could be a great
1:41
replacement for your aging PC um or an
1:44
aging MacBook that you may not be able
1:45
to get even any money out of um you may
1:48
be able to install cloud ready onto it
1:50
and actually kind of Bring It Back to
1:52
Life which is really neat um it's
1:54
specifically what I've done with this PC
1:56
here that's uh quite a few years old um
1:59
it's got a core
2:01
i5 8 gigs of RAM so it's it's a decent
2:04
device but uh it's a second gen Core i5
2:07
so it's an older processor and it was
2:08
really starting to struggle with Windows
2:10
in general so I decided you know what
2:13
I'm going to give this a try we'll make
2:14
a video about it and as you can see I've
2:16
already actually got Chrome OS or
2:17
chromium OS um cloud ready specifically
2:20
already running on this device here um
2:23
and what we're going to do is reinstall
2:24
it cuz one of the caveats of this is and
2:26
there are very few um honestly it feels
2:28
exactly like Chrome OS but one of them
2:31
is there's no power wash feature so you
2:32
actually have to uh reinstall which is
2:35
beneficial cuz I can actually go through
2:37
the whole process and show you and the
2:39
fun part about this little tutorial is
2:41
I'm actually going to set up the entire
2:43
process from a cloud ready PC so we're
2:45
going to take a cloud ready PC and
2:47
basically remake another cloud ready PC
2:49
as we show you the steps on how to go
2:51
through and do this on your own device
2:53
now there's a link below that tells uh
2:55
exactly what devices are supported
2:57
because they support quite a few I want
3:00
to say it's a few hundred devices at
3:01
this point right now and the list
3:03
continues to grow if your device is not
3:06
on here go ahead and try it because as
3:08
you'll see here in a few minutes the USB
3:10
part whenever we first set this up you
3:12
actually can run this entire thing off
3:14
of a USB stick and so as long as you
3:17
have all the things together to get this
3:19
thing going you can actually try it
3:21
first if you like it and you're like hey
3:22
I want to ditch Windows which is what I
3:24
did with this device here you can go
3:26
ahead and move forward with that but if
3:27
you want to run it off a USB to try out
3:30
and and decide that you don't want to
3:32
you're completely fine to do that as
3:33
well so let's dive in and talk first
3:36
about the things that you're going to
3:37
need in order to get this uh install up
3:40
and running first a computer from the
3:43
list there's a link down below you can
3:44
check to see if your devices on that
3:46
list if not I would say go ahead and
3:48
give it a try still you need a USB stick
3:50
8 or 16 gigs we're going to download so
3:54
you will need the Chromebook recovery
3:56
utility it is in the Chrome web store
3:59
and then you're just going to need some
4:00
time and a little bit of patience it
4:01
doesn't take a ton of time uh but it
4:04
does take a few minutes so at this point
4:07
Let's Pretend This is any regular
4:09
Chromebook or PC or Macbook so I'm going
4:11
to take you through instructions that
4:12
would work on anything granted again
4:14
this is basically Chrome OS running um
4:17
cuz I thought it would be kind of neat
4:18
for you get to see a little bit of what
4:20
cloud ready looks like actually in
4:22
action and as I said before it looks
4:25
identical to Chrome OS so the first
4:27
thing we're going to do is we're
4:28
actually going to get get cloud ready
4:30
and so if you go to
4:33
www.ar.com slf freeownload or if you
4:37
just search neverware or search cloud
4:39
ready you're going to find this anyway
4:41
once you get here for most folks a
4:44
64-bit is going to be what you want to
4:45
go with um if you do have old old
4:48
computer pennium 4 and before like the
4:50
core Duo there's some MacBooks on the
4:52
list that have that processor or if it's
4:55
an Atom Processor so if it's a 32-bit
4:56
processor you need to get 32-bit um I'm
4:59
hoping at this point if you're jumping
5:01
into this that um you'll be able to
5:03
identify those things on your computer
5:04
mine is
5:05
64 um so you click this and the download
5:09
is going to start because it's a pretty
5:11
large file it's 590 Megs um I went ahead
5:14
and just downloaded it before this so
5:15
that we can move forward a little
5:16
quicker Next Step we're going to go to
5:19
the web store so if we just type in
5:20
Chrome web
5:22
store some people have it up here in
5:24
their bookmarks um I'm on Chrome OS so
5:27
it would be down here as well um but
5:29
again we're trying to treat this as if
5:31
we are going from any operating system
5:34
Chrome web store we need now the
5:36
recovery utility so we're just going to
5:39
type in Chrome
5:41
recovery
5:45
utility first one it's going to ask if
5:48
you want to add it yes of course you
5:49
want to add it that's the whole reason
5:50
we looked for
5:51
it and it is added from there we're
5:55
going to click
5:58
recovery instead of going through the
6:00
get started process we're actually going
6:01
to click the gear so that we can use a
6:03
local image which is the image that we
6:05
just downloaded so we want to use that
6:09
click that click open it's going to ask
6:11
you to select the media I've already put
6:14
my USB stick here so you would put it
6:16
into your USB at that point if you
6:18
haven't already choose it and this is
6:21
asking if it's the correct media I think
6:23
it's a little bit large it's 128 gigs
6:25
and so it's not sure what to do with
6:27
that create recovery image I'm not going
6:29
to click create now because that disc
6:31
has actually already got this written Um
6:33
this can take anywhere between 15 and 30
6:35
minutes depending on how fast your
6:37
machine is I believe with this one I
6:39
want to say it took about 10 to 12
6:40
minutes um so it was relatively quick
6:43
now if you have a really old machine it
6:45
could take a little bit longer so uh
6:47
just prepare yourself you'll watch the
6:48
progress bar go when it's done it'll say
6:50
hey I'm done uh you can eject me and so
6:53
we're just going to exit out at that
6:57
point and then depending on
6:59
on where you have installed this if
7:02
you've done this on your PC leave the
7:04
USB stick in there uh we're going to
7:06
shut down and you're going to restart
7:08
and boot from the USB and we'll see how
7:10
this
7:11
works now it does take a little bit of
7:13
time to write uh or to to write when if
7:15
you decide to move forward we're going
7:17
to talk about that in just a second with
7:18
the full install but uh apart from that
7:21
as long as you've got your computer set
7:22
to boot from USB first um it's it it'll
7:26
boot right up no problem so what we're
7:27
going to do is go and power down
7:33
all right guys after a few minutes you
7:34
should be booted up into what looks like
7:37
Chrome OS the welcome screen other than
7:39
the fact that instead of the splash
7:40
screen saying uh Chrome OS it says cloud
7:43
ready the whole intro and set of process
7:46
should feel very familiar it's the exact
7:48
same process so I went ahead and got
7:49
through all that kind of stuff uh and
7:51
got into
7:53
um into the setup running on this HP and
7:56
so this is running actually from the uh
7:59
the USB slot and we're going to look at
8:01
how quickly it runs really quick uh in
8:03
just a second a real quick note um if if
8:06
you put the USB stick in and went to
8:08
boot and it just booted back into
8:10
Windows um you probably need to do some
8:12
research on the device you have there's
8:15
lots of different ways uh to get into
8:17
your bios but you need to go into the
8:18
BIOS and tell it to look for the USB
8:21
first instead of booting from your hard
8:23
drive and so uh there's a lot of
8:25
information there's no way I can cover
8:27
all of it uh now but uh tons of
8:29
information on Google if you were to go
8:31
out and Google and figure out how to get
8:32
into your bios set that boot to USB
8:35
first and basically all that's doing is
8:36
telling your computer look here first if
8:39
you don't see anything go ahead and boot
8:40
up from the hard drive but uh you can
8:42
tell it had to boot from USB and you can
8:44
look up you know model number of your
8:46
computer boot from USB drive click enter
8:50
find an article uh and set that bio
8:52
stuff up and then this should you should
8:53
get to this point with some relative
8:55
ease um I'll show you a couple things
8:58
real quick again as you can see the
8:59
entire interface looks exactly the same
9:01
file browser um all that kind of stuff
9:03
your settings menu all the same um the
9:07
only thing you'll see different is right
9:08
now this is on uh Chrome 50 and so uh
9:12
stable is on 51 so it's a it's about a
9:14
version behind so you're probably going
9:16
to run behind cuz obviously neverware
9:17
has to take uh chromium OS as it comes
9:20
out and make sure it works with all
9:22
their stuff before they push out their
9:23
own
9:24
updates I'm going to show you something
9:26
real
9:28
quick
9:30
because as I started moving around this
9:32
device uh now with Chrome on it like I
9:34
said it was insanely sluggy with uh with
9:36
with Windows it was it was sluggish it
9:38
was uh slow it didn't perform very well
9:42
and once I got this on here everything
9:44
seems to move really really quickly so
9:46
I'm not going to go away from this while
9:48
it's doing its thing CU I want to give
9:49
it its best shot to to Really perform uh
9:52
but I can tell you while it's running um
9:54
I really wanted to try to push it cuz it
9:56
it kept just kind of chewing up
9:57
everything I was throwing at it so I had
9:59
7even 1080p videos running from YouTube
10:02
I had the Verge and Gadget Android
10:04
Central all open I opened pixel the full
10:08
version of Pixel the pixel Express I had
10:11
Hangouts open uh Google keep open I had
10:14
shift edit my IDE running with a couple
10:17
uh PHP and CSS files open and the thing
10:20
just didn't have a problem 248 I got
10:23
269 uh the other day so that's putting
10:26
it up there octane score-wise with my
10:28
pixel LS and so that tells you here we
10:30
have a four or fivey old uh and and
10:33
granted it wasn't brand new probably
10:35
four or five years ago when I bought it
10:36
it was it was a a bargain basically um
10:40
device over here that had gotten to the
10:42
point where running Windows on it wasn't
10:43
even practical and now we have Chrome OS
10:45
on here and this thing absolutely flies
10:47
no problem uh it's quick it's Speedy
10:50
it's gorgeous and it runs really really
10:52
well um and so congrats to uh the guys
10:55
that never wear guys and gals um cloud
10:59
ready is is legit it works it's awesome
11:02
and I hope this guide has helped you uh
11:04
figure out how to get this installed on
11:05
your device if you have any questions uh
11:07
hopefully we can help you feel those to
11:09
an extent obviously we're not tech
11:10
support and um the the forums at
11:13
neverware are really good you I found
11:15
every answer to every question I've had
11:16
so far in their forums uh this is a
11:19
great service and it's free so if you
11:21
have an old computer lying around and
11:23
want to take on a little experiment this
11:25
isn't a huge deal um jump in uh follow
11:28
the instructions try it like I said it's
11:30
it's no harm no foul if you don't like
11:32
it you turn this thing off yank the USB
11:34
stick out you're back to Windows if you
11:36
do decide that you uh uh want to keep it
11:40
um over here in your settings since I'm
11:42
running from USB now it says install
11:43
cloud ready and I will tell you the
11:45
partition on your USB is actually pretty
11:47
small um so you don't have a lot of room
11:49
to work with
11:50
technically um and there may be some
11:52
ways around that I didn't spend the time
11:53
to look that up I may be able to
11:55
partition this entire uh USB drive and
11:58
run it off there if if so it runs so
12:00
fast off USB it didn't bother me at all
12:02
and these are USB 2.0 ports these aren't
12:04
even usb3 ports on here so it even has
12:07
room to actually speed up the operations
12:10
but if you decide you know what I don't
12:11
want windows on here anymore I want to
12:13
take full advantage of my installed hard
12:14
drive I don't want to boot from USB all
12:16
that stuff you just click install cloud
12:17
ready and give yourself some time it's
12:19
going to take a little bit of time to do
12:21
what it needs to do um and there's two
12:23
options so I'm going to click install
12:25
cloud ready and before we get started um
12:28
yeah it's telling you you're going to
12:29
lose everything if your UEFI if you
12:32
don't know what this is um I would say
12:35
that you probably don't have a device
12:36
like that um I had to do some research
12:38
on it and I honestly couldn't tell you
12:40
what it is right now I tried that on
12:42
this device I tried to do do a dual boot
12:44
so I could kind of have both at the same
12:46
time and it failed pretty miserably um
12:49
but I got cloud ready backup and running
12:50
off the USB stick and just did install
12:52
Standalone cloud ready wiped out windows
12:55
I have full uh access to my hard drive
12:58
when I'm not booted from the USB here
13:00
and it runs uh a little bit faster but
13:03
not much really um so a couple different
13:06
options there but uh hope some of you
13:08
guys try this and I hope it works out
13:10
well for you and I hope that maybe it
13:11
can bring some life back to some aging
13:14
uh devices that you weren't sure exactly
13:16
what you were going to do with guys
13:18
thanks for watching please uh hit that
13:20
like button down below and subscribe
13:22
down below the um we have videos that
13:24
continually are coming we we're going to
13:26
continue doing more um helpful videos
13:28
like this and reviews and unboxings and
13:30
all that kind of stuff so more
13:32
subscribers the better more thumbs up
13:34
the better leave comments down below if
13:35
you have any questions and we'll try our
13:37
best to get those things answered for
13:38
you until next time guys thanks for
13:40
watching see
13:42
[Music]
13:47
you
#Software
#Operating Systems
#Open Source