
“How do you do CAPS?” is one of the most common questions that I, in my many years working in Tech Support, would get from my users when I was setting them up with a Chromebook. People are used to – and depend on – their Caps Lock key. Nevermind using Shift when you need to capitalize one letter out of your password; lots of people just toggle Caps Lock on and off as-needed because that’s the way they’ve always done it, and showing them otherwise is just one more thing they’re going to have to learn and adjust to. It was already frustrating enough for them to switch from the desktop they were used to in the first place, so if I wanted to do my job right, I needed to make the transition as seamless as possible.
So I introduced them to the “Everything Button”. If you are unfamiliar with which button that is, here’s some background: Back in 2020, Google renamed what Chromebook users knew as the “Search” or “Launcher” key to the “Everything Button”. As its name implies, it can do pretty much, well, EVERYTHING. It is the transformer key so to speak. It can transform from Search to Ctrl, to Alt, to the Assistant, and the sought-after Caps Lock among other options. The beauty of it is that the Everything Button can serve as Caps Lock temporarily using a keyboard shortcut or you can set it up to stay as such with a more set-it-and-forget-it approach. Here’s how you do it.
Before we begin
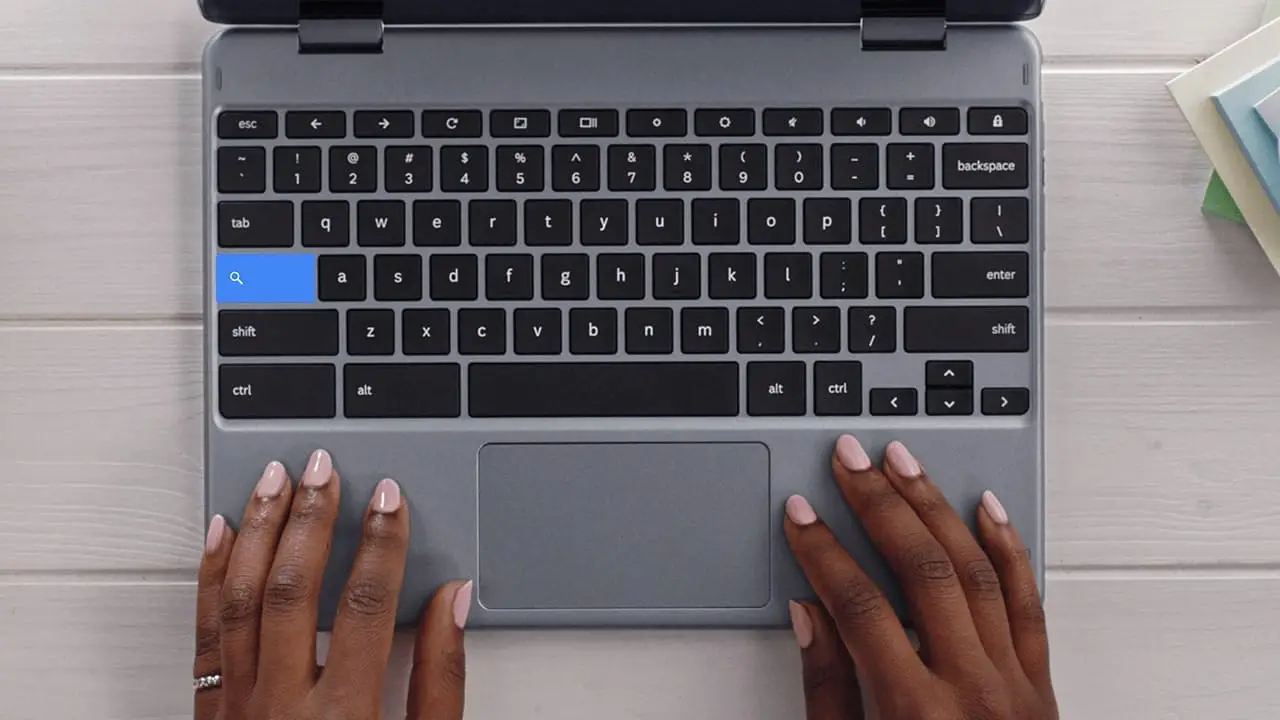
Identify the Everything Button on your Chromebook’s keyboard. Although the key is always physically in the same place, the keycap symbol can be different depending on your Chromebook’s model. In some Chromebooks, it can be a literal search icon, while in others it is simply a circle. No matter which Chromebook model you have though, the Everything Button is always the key right above the left Shift key.
How to turn Caps Lock on and off with a keyboard shortcut
Want to use the Everything Button as Caps Lock but don’t want to commit to that change? You can engage Caps Lock mode on an as-needed basis by holding down the Alt Key + Everything Button and then repeating the same action when you want to turn Caps Lock off.

This method requires the use of an extra keystroke but also gives you the flexibility to continue using the Everything Button as Search and your launcher key, which is its default setting.
How to turn Caps Lock on and off with only one key
However, if you want to use Caps Lock the traditional way, where you only have to press one key to turn it off and on, keep reading below.
Just Give Me The Steps!
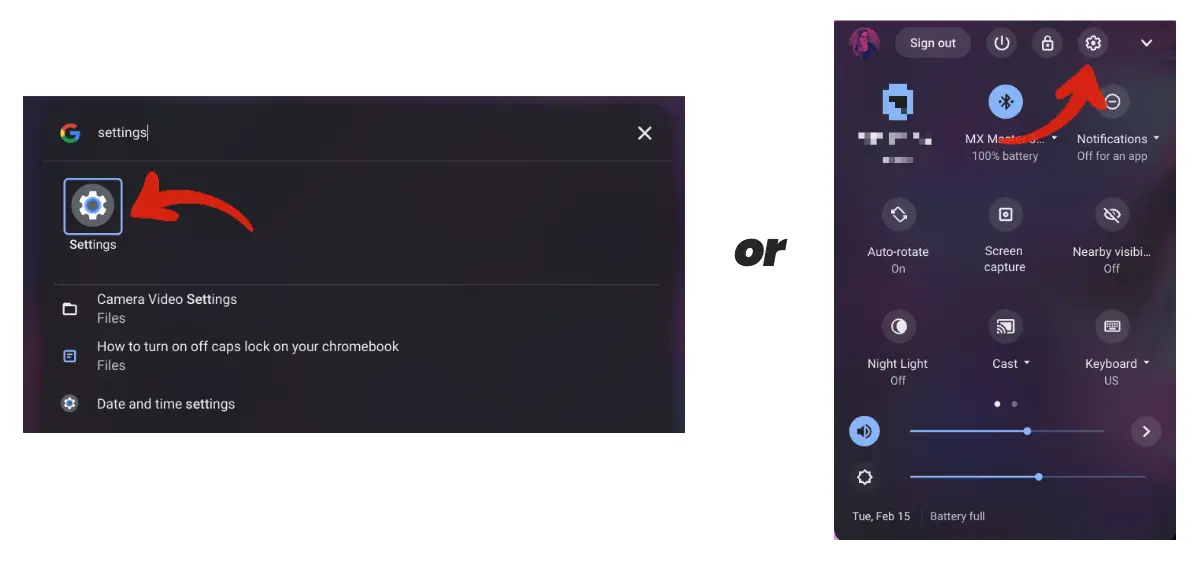
1. Access your Chromebook’s settings
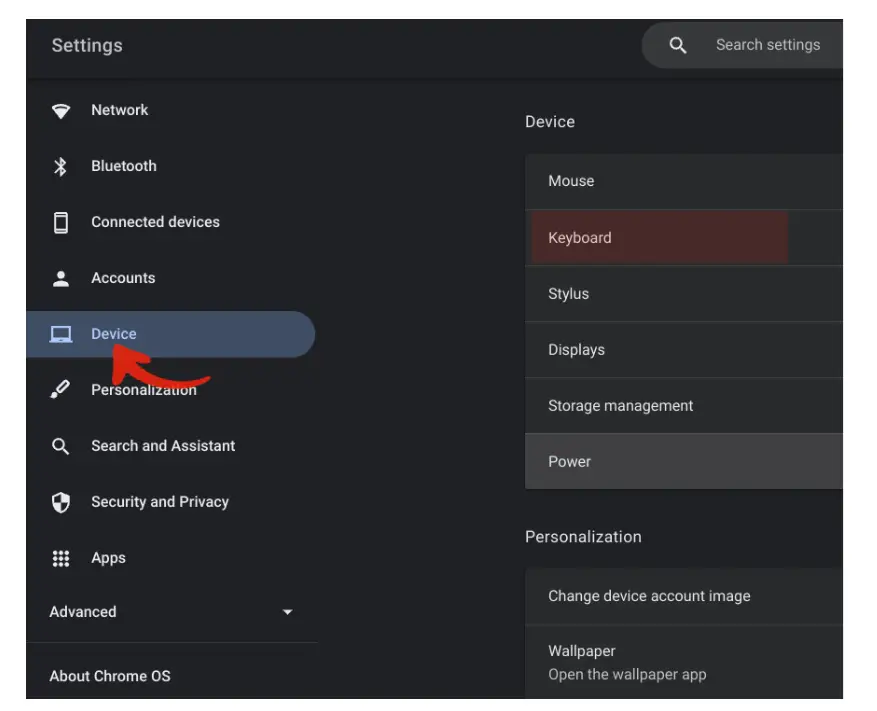
2. Select “Device:” from the settings options on the left
3. Select “Keyboard” from the Device settings options
4. Click on the drop-down next to “Search” and select “Caps Lock”
Open your Chromebook’s settings which you can access by either opening your launcher and searching for “Settings” or by clicking on the Settings icon directly from the status tray.
Once you are inside Settings, select “Device” from the options on the left side panel. This will populate selections to the right. Selecting “Keyboard” from those options will take you to another menu that will show you the different keys on Chrome OS that are customizable, the first of which is the “Search” key. Click on the drop-down that corresponds to that key, and select “Caps Lock” from the options presented.

Pro Tip: If you use an external keyboard, the “External Meta” drop-down is where you can customize what the CMD key on a Mac or the Windows key on a Windows system can do on Chrome OS. In my case, I prefer to use it as the Launcher or Search, but you can also set it up to invoke the Google Assistant if that is what you prefer.
Whichever method you prefer, using one of them is definitely better than not having a Caps Lock key at all. I am the set-it-and-forget-it type, and as someone who switches pretty often between operating systems, I don’t want to have to retrain my muscle memory every single time. This is why I prefer to swap my Launcher/Search with another key that I don’t often use. This ensures a seamless transition for both myself and any potential new Chromebook users that I may be training or setting up. Let me know in the comments below if you found this guide useful and which of the two methods outlined you prefer!
Newsletter Signup

Leave a Reply
You must be logged in to post a comment.